How to minimize supports when 3D printing?
Aug 16,2023 | 3D4Create
Many 3D printed objects rely on support structures to print specific features and overhangs successfully. While some printers utilize dissolvable supports that can be washed away, most use the same material requiring manual removal. Optimizing placement and settings can minimize dependence on supports.
This blog explores techniques to slash unnecessary supports for faster prints and lower material use.
I. What are 3D printing supports and why are they needed?
In 3D printing, supports provide a foundation for overhanging surfaces, bridging small gaps, and holding up protruding structures that would otherwise print mid-air. As each new layer is printed, there needs to be adequate material beneath it to keep the print stable.
Without supports, protruding and curved geometries are prone to warping and deforming under their own weight. The hot plastic will sag and ends up with a messy blob-like appearance. Supports also prevent delicate features from breaking off during the print.
While supports are useful, they can be tricky to remove once the print is finished. Support structures leave scar marks on the surface and can damage intricate details when detached. This is why it's ideal to minimize supports whenever possible.
II. Optimizing Model Orientation to Reduce Supports
One of the easiest ways to reduce supports is to orient your model strategically on the print bed. Parts should be positioned to require the least amount of bridging and overhangs.
- Lay your model flat or at an angle so there are fewer unsupported overhangs. Flat surfaces require no supports at all.
- Orient any small contact points, like pins or pegs, so they print directly onto the bed rather than floating mid-air.
- Angle overhanging features so there is less of an unsupported span. 45 degrees or less is typically recommended.
Taking gravity into account goes a long way in minimizing tricky overhangs that require extensive supports. Sometimes simply rotating the object a certain way makes all the difference.


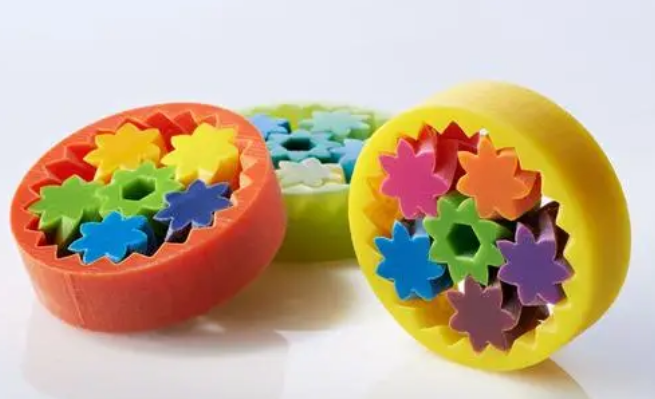
Windmill Flower Pen Holder With Supports
III. Modifying Model Design to Minimize Supports
With some creative modeling techniques, you can design 3D prints that require far fewer supports. Here are some ways to modify models to reduce overhanging structures:
- Consolidate multiple parts into one print to avoid bridging between separate pieces.
- Strategically cut away any unnecessary surface area underneath overhangs to eliminate areas that need supporting.
- Avoid steep overhangs and long spans in your model designs. Break up extended protruding structures.
- Minimize intricate surface details on undersides and areas that overhang since they are tricky to support properly.
Putting some thought into the modeling stage goes a long way in minimizing headaches when it comes time to print. Simple changes like tilting surfaces and removing problematic geometry helps optimize the end result.
IV. Using Optimized Slicer Settings for Supports
Dialing in the right settings in your slicer software also helps reduce unnecessary supports. The slicer generates editable support structures that you can customize.
- Adjust the support density, pattern, and percentage of build plate contact to reduce the footprint.
- Use smarter support generation settings like "support on build plate only" and support blockers to avoid supporting specific areas.
- Minimize the height and base size of supports. Larger interface layers leave bigger marks.
- Orient support structures vertically or diagonally to make them easier to detach.
Take time to tweak the slicer support settings for each specific model and overhang area. The right settings go a long way in minimizing tricky support clean up.
V. Choosing Optimal Support Structures
There are a few different types of support structures, each with their own pros and cons. Choosing the right one helps improve print quality and minimize scarring.
- Tree supports use less material than linear supports and are easier to detach without damaging the print.
- Block or cone shaped support structures leave smaller contact points.
- Lines and lattices use less material while still providing adequate overhang support.
- Customizable support blocks that match the model contour are less likely to warp or deform delicate areas.
Experiment with the various support types to find what works best for your particular model geometry and overhang areas. The right structures detach cleaner and easier.
VI. Removing Supports and Finishing Prints
Once your print is done, take care when detaching the supports to avoid damaging the model. Here are some tips:
- Carefully twist, pry, and break away supports. Go slowly to prevent ripping or warping delicate overhangs.
- Use flush cutters or craft knife for supports that are hard to access or remove by hand.
- For tough support material like ABS, an oven or heat gun helps soften and detach supports.
- Sand and polish away any marks or scars left behind by supports. Start with coarse grit and work up to fine for best results.
Proper cleanup and finish work helps minimize the visible signs of support structures. When designed and integrated properly, supports can be incredibly useful for opening up complex geometries in 3D printing. With some added effort, their impact on the final print quality can be reduced significantly.
VII. Conclusion
While supports are a necessary evil in certain 3D printing scenarios, there are many optimization techniques to minimize their use. Strategic placement, design changes, slicer settings, optimal structures, and clean up measures collectively help reduce the need for excessive supports. Experiment and iterate to find the right balance for each model. With careful planning, supports don't have to hinder your ability to create intricate 3D printed objects.
FAQS:
Q1. How can I orient my model to minimize supports in 3D printing?
A1: Tilting your model to minimize overhangs, orienting small contact points directly on the print bed, and angling protruding geometries to around 45 degrees or less are effective ways to reduce the need for extensive supports.
Q2. What settings in Cura make supports easier to remove?
A2: Reducing the support density, using a lighter support pattern, minimizing the interface layer height, and enabling options like "support on build plate only" can make Cura supports clean up easier after printing.
Q3. How can I print overhangs without support structures?
A3: Design techniques like splitting models into multiple parts, strategically cutting away overhanging surfaces, and avoiding steep angles can often eliminate the need for supports on overhangs. Tree supports are also easier to detach than dense linear supports.
See Also:
Comente