Adding Text on STL Models in Tinkercad and Bambu: A Step-by-Step Guide
Jun 21,2024 | 3D4Create
Have you ever wanted to create custom text, including name and label, on your STL model to personalize your 3D prints? Tinkercad, a user-friendly online 3D design tool, streamlines this process, making it accessible for beginners, while Bambu Studio is more suitable for seasoned creators. In this blog post, we'll guide you step-by-step on how to add custom text to your STL models respectively using Tinkercad and Bambu Studio, ensuring your designs are unique and tailored to your needs.
Importance of Inserting Text to STL Models
Adding text to STL models is a valuable feature in 3D printing and design for several reasons:
- Personalization: By appending custom text, individuals can personalize objects with names, dates, or messages. This is particularly popular for creating unique gifts, custom products, or keepsakes.
- Branding: Text allows for the incorporation of logos, brand names, or trademarks directly onto products or prototypes. This not only enhances brand visibility but also helps in protecting intellectual property.
- Instructions and Safety: Embedding instructions, warnings, or safety information directly on models can ensure users have crucial information at a glance. This is especially useful in manufacturing or assembly processes.
- Functional Use: Text can serve a functional purpose in design, such as indicating measurements, orientation, or positioning. This can be particularly helpful in complex assemblies to ensure accurate construction or usage.
- Aesthetics: Custom text can enhance the visual appeal of a model, making it more aesthetically pleasing. Designers can utilize various fonts and styles to complement the overall design of the object.
Step By Step Guide for Adding Text to STL Models on Tinkercad
Step 1: Access Tinkercad and Create Your Account
As an online 3D design platform, you can directly access Tinkercad on Google. Click on Create a personal account and sign up for your own account through an e-mail address.

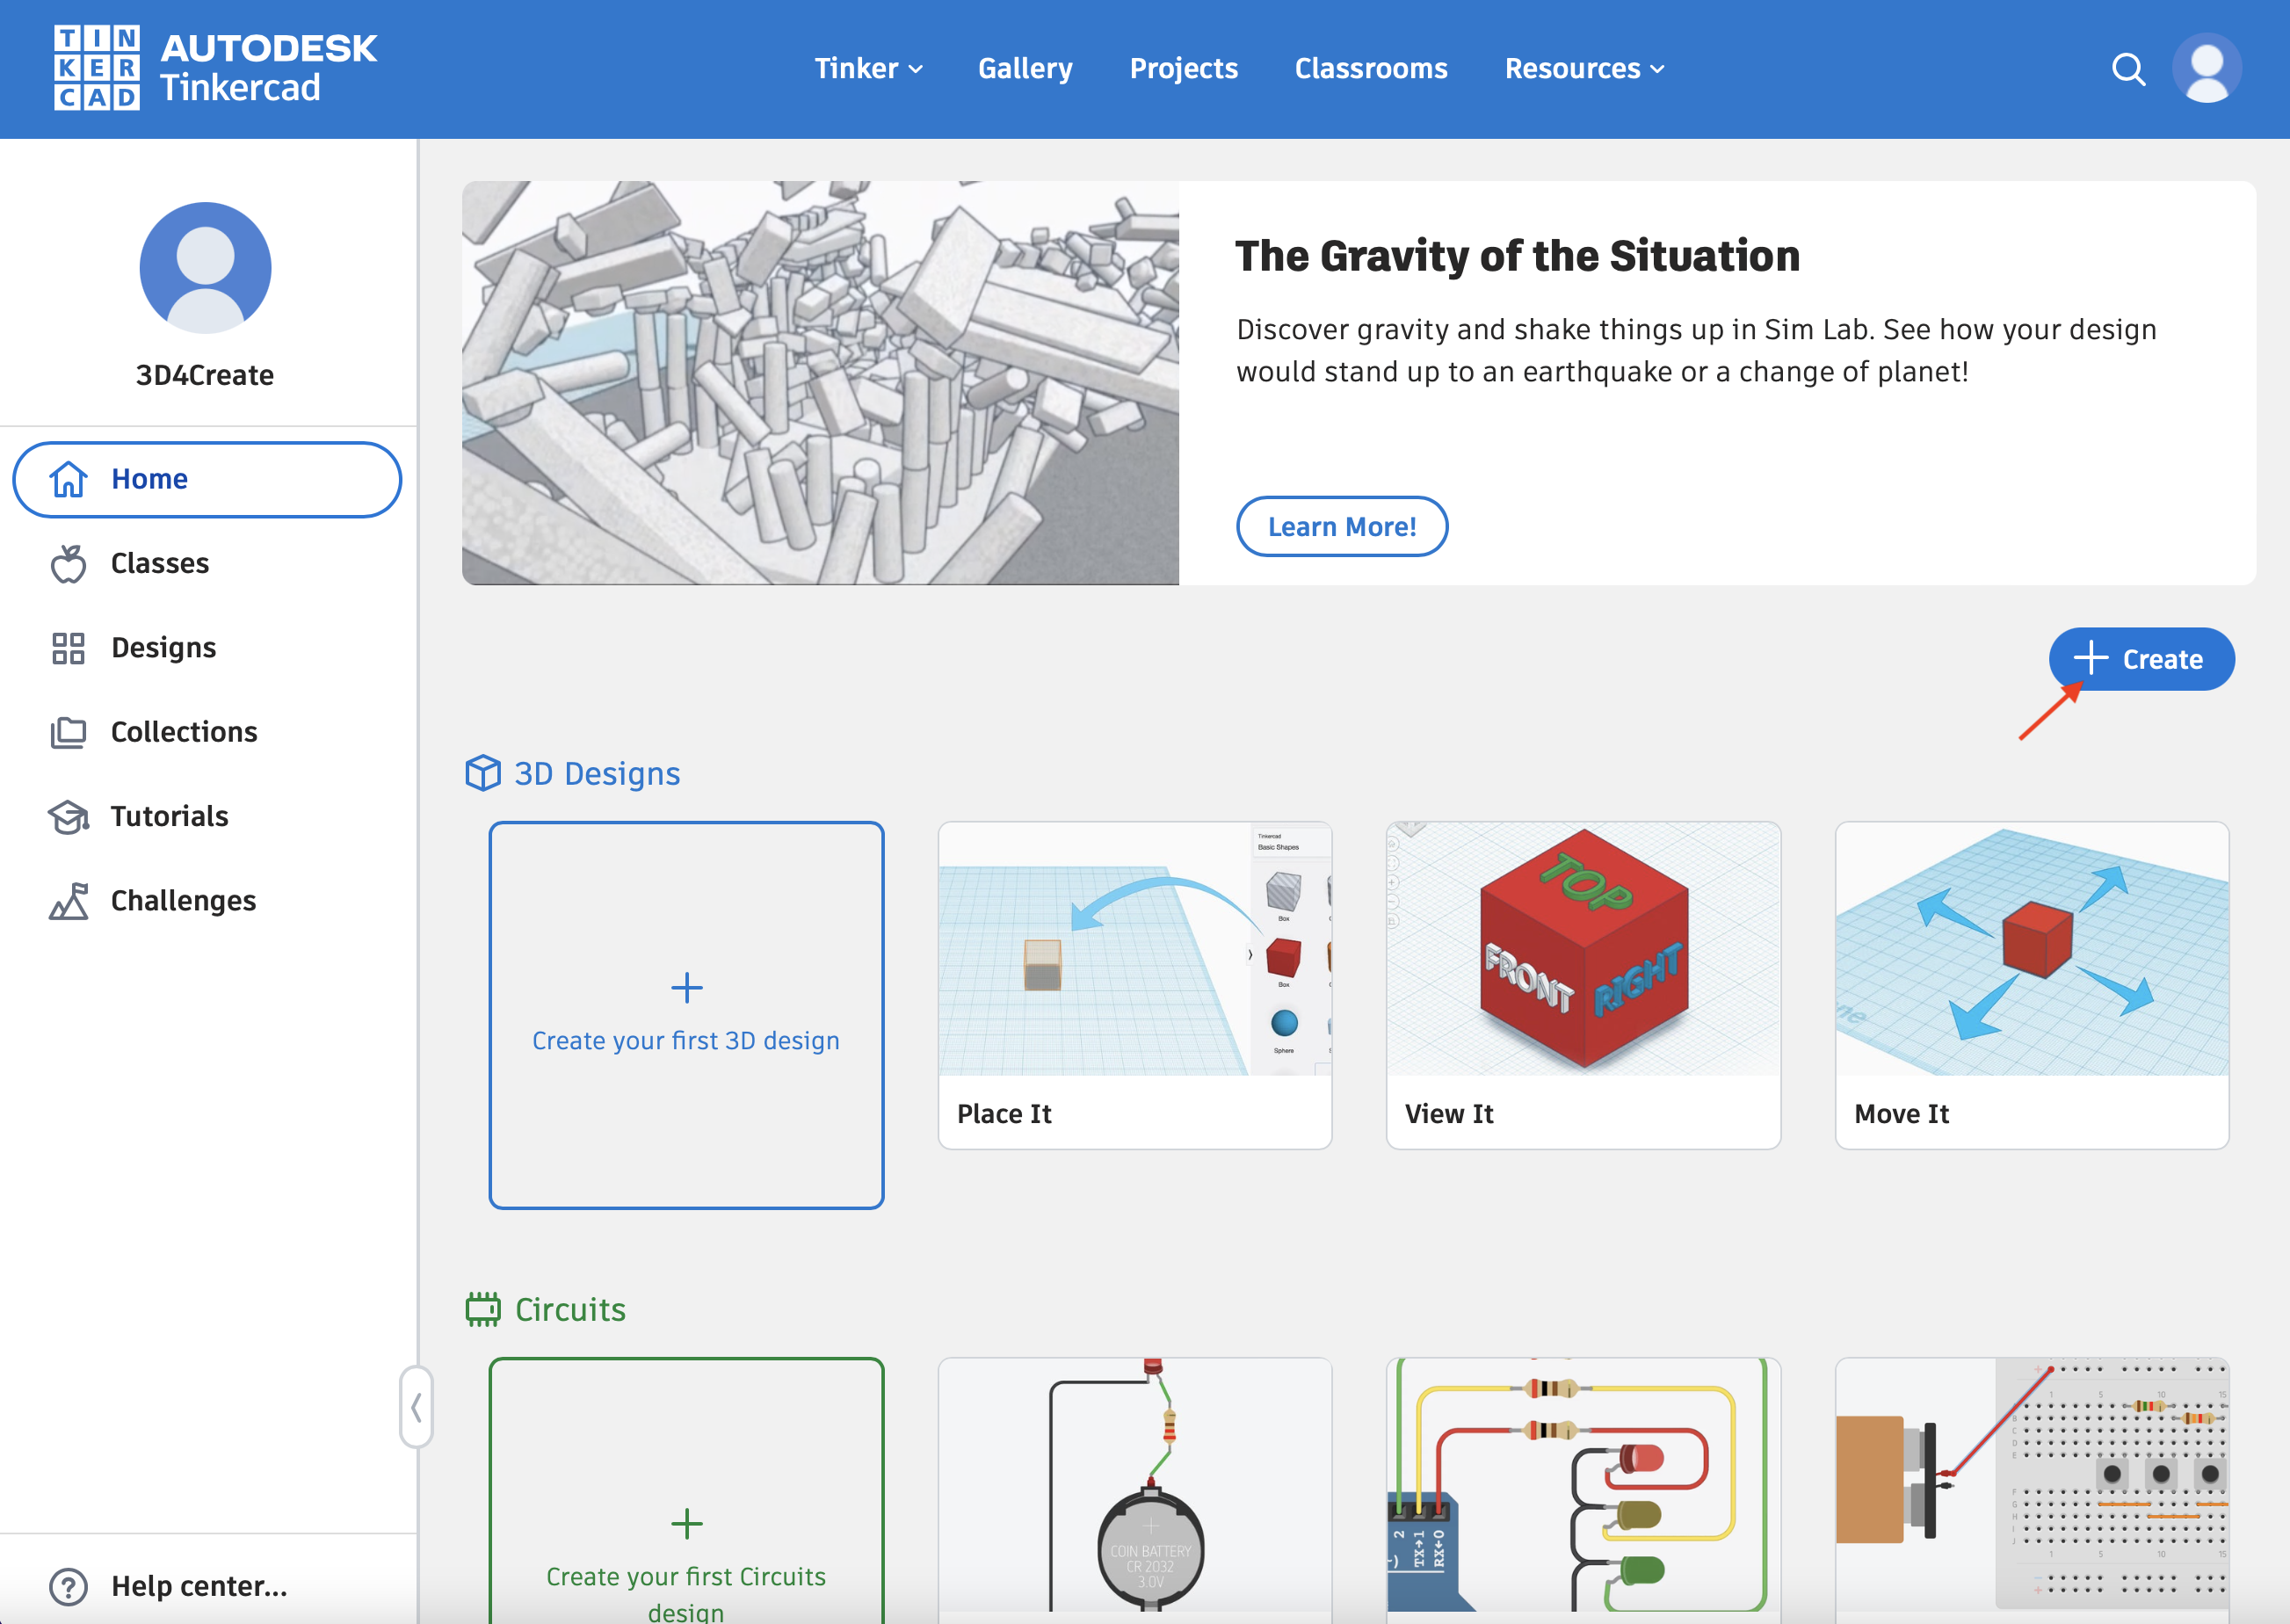
Step 2: Create a 3D Design Project
After signing up, you are now on the main page, click on +Create and select 3D Design.
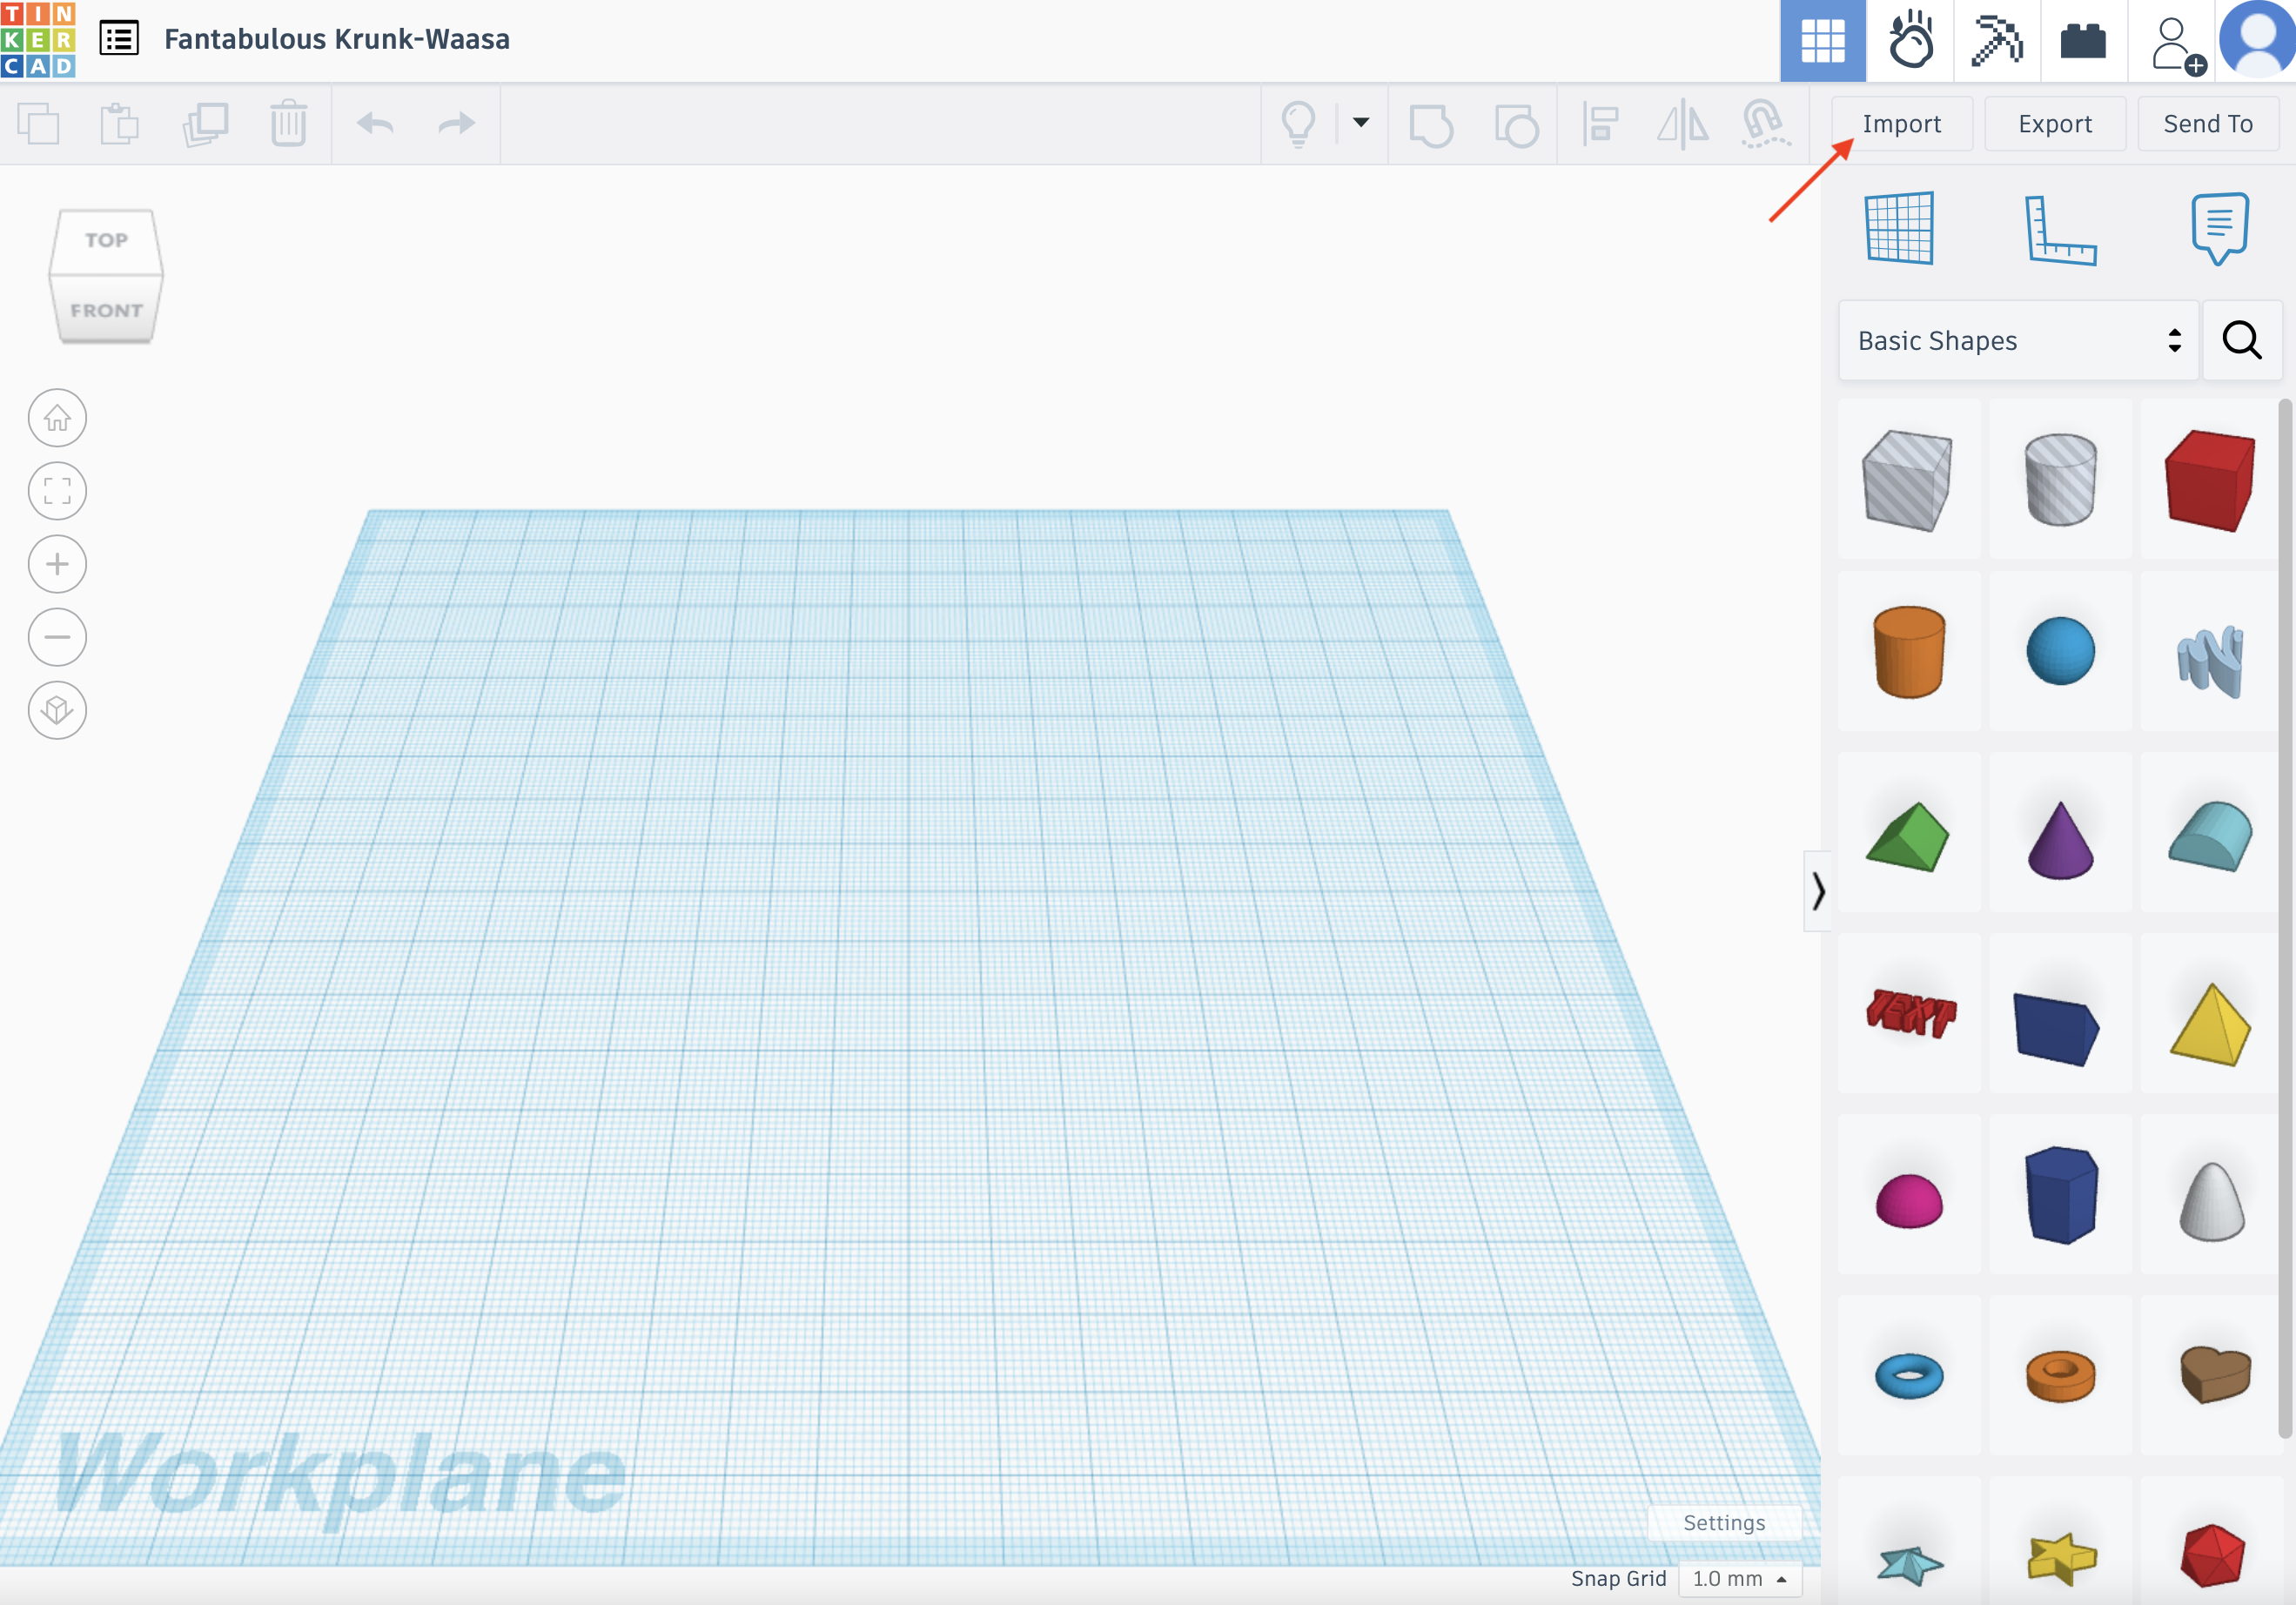
Step 3: Import Your STL File into Tinkercad
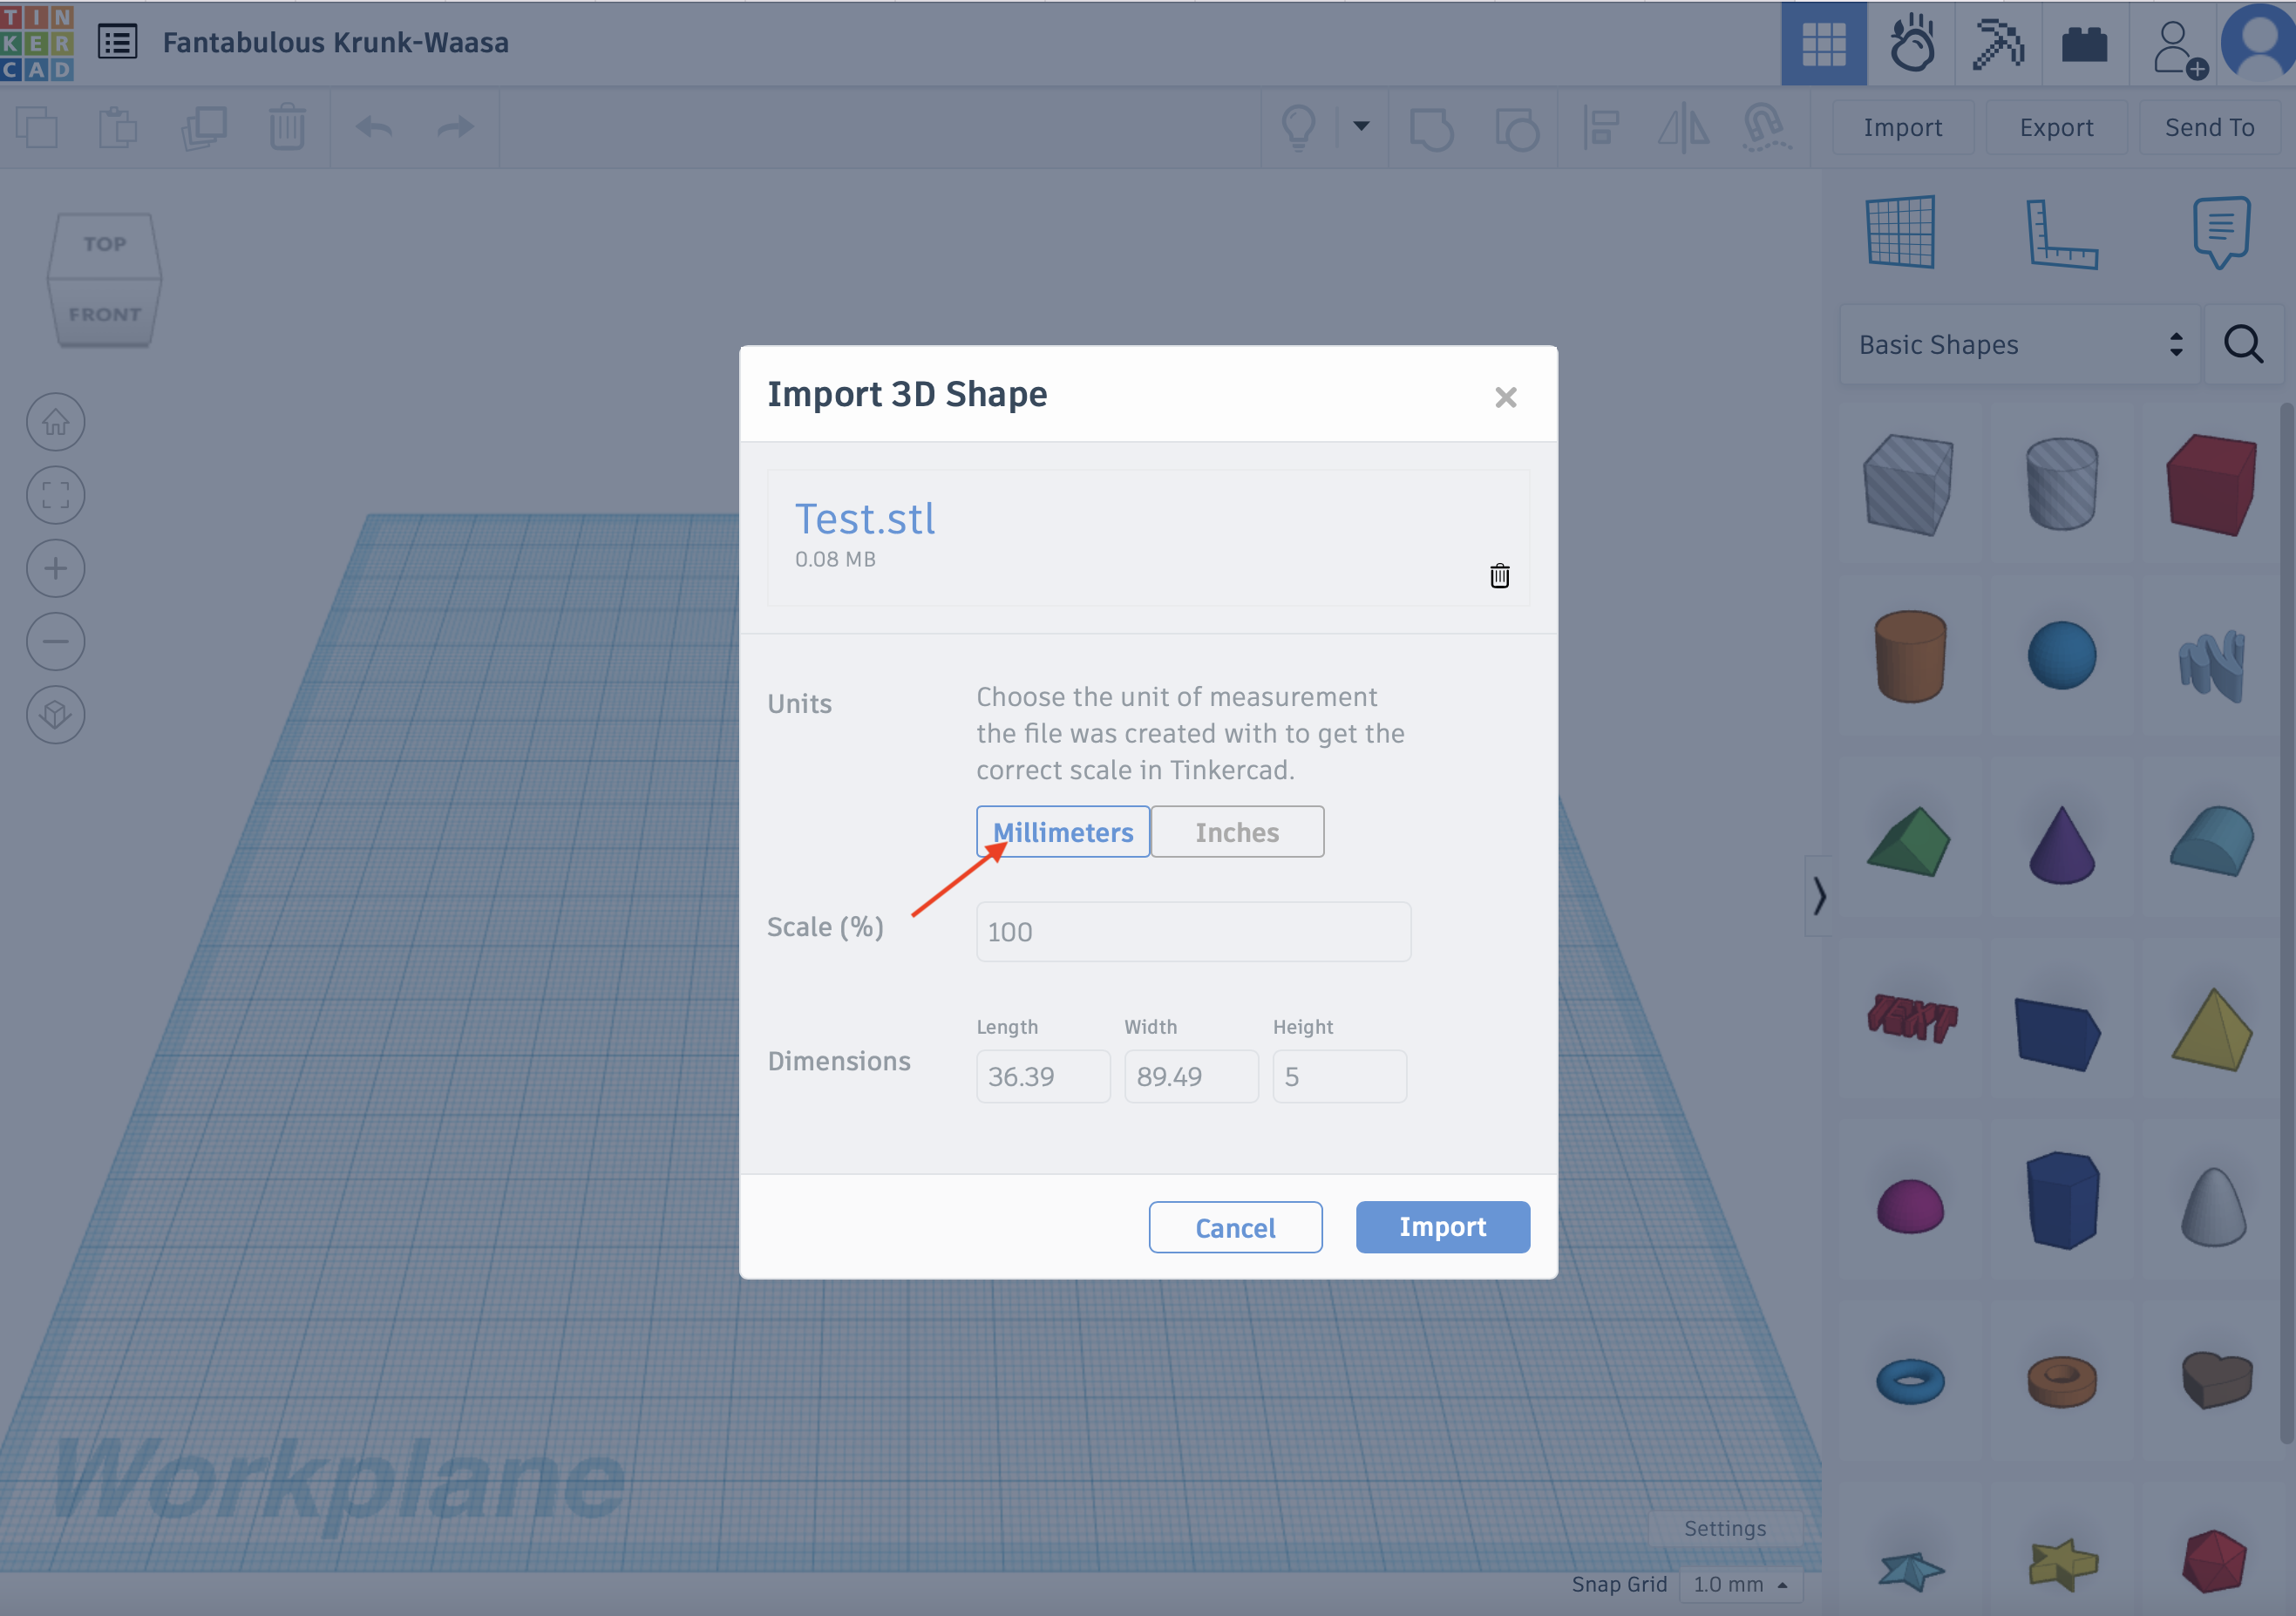
Now, you can import your STL file into Tinkercad and show it on the bench. Click on Import and choose a file from your device. Remember to choose Millimeters to ensure your design is small enough to be placed on the bench.
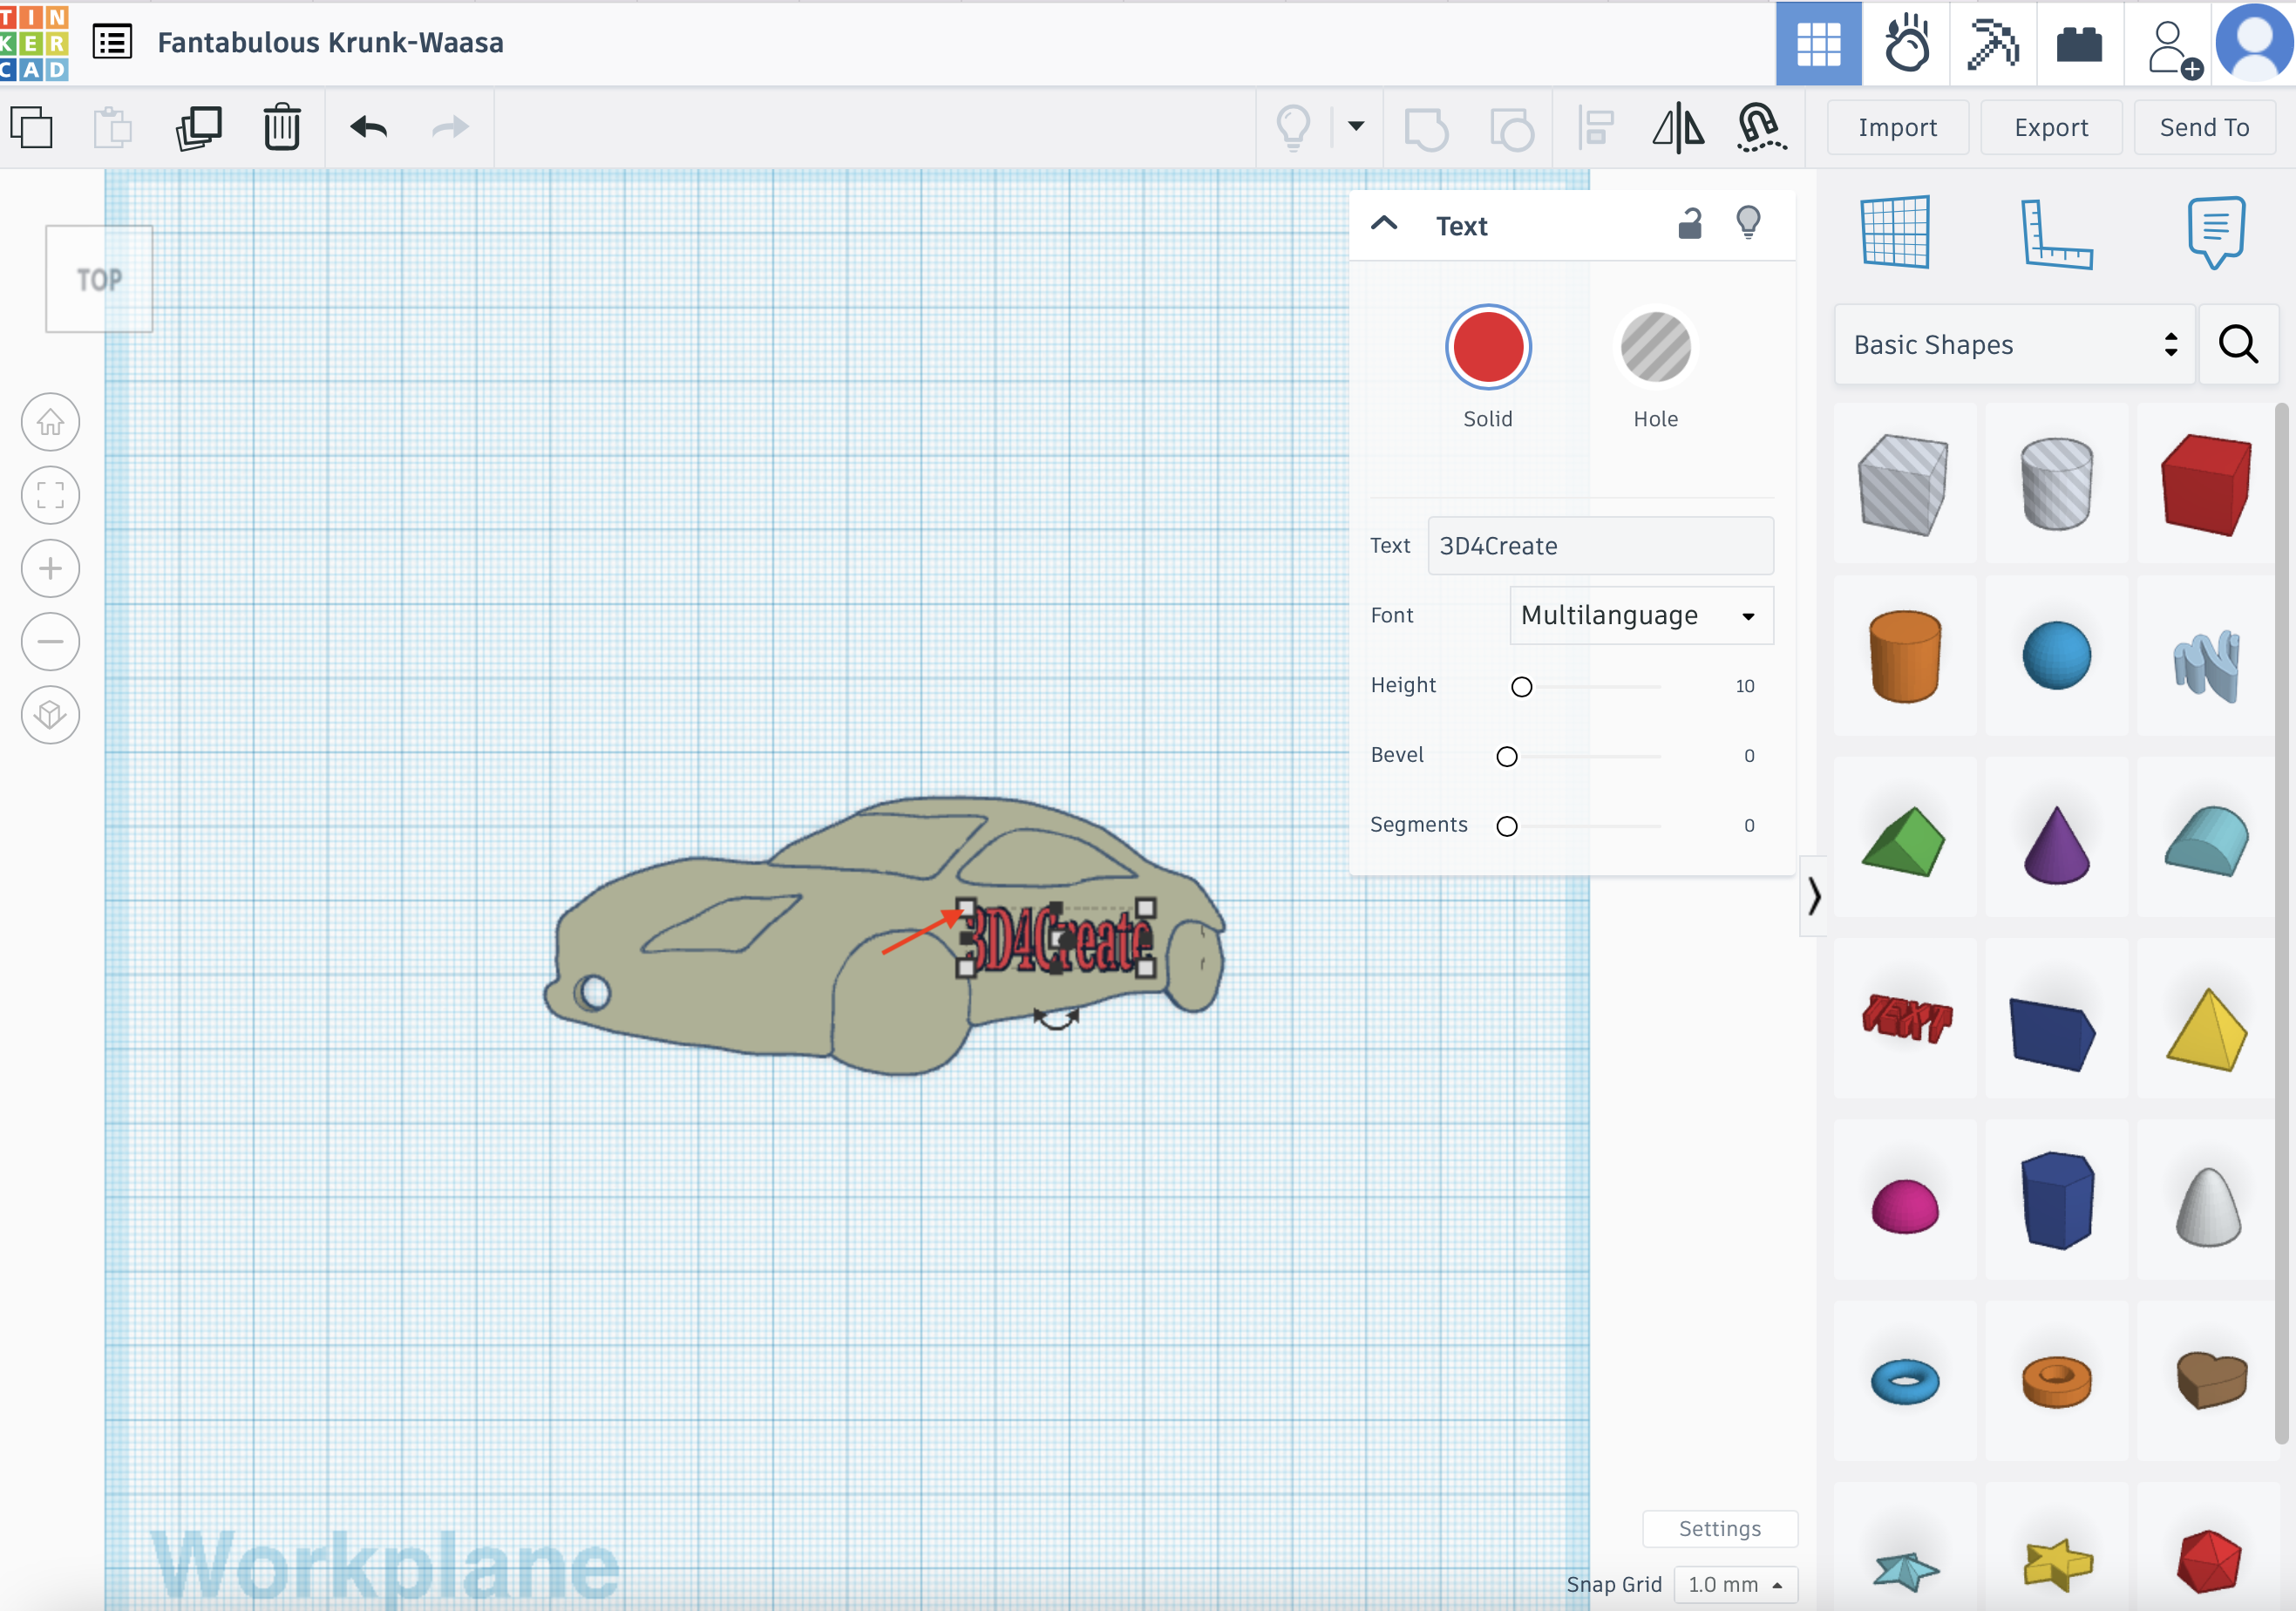
Step 4: Insert Text to Your STL File
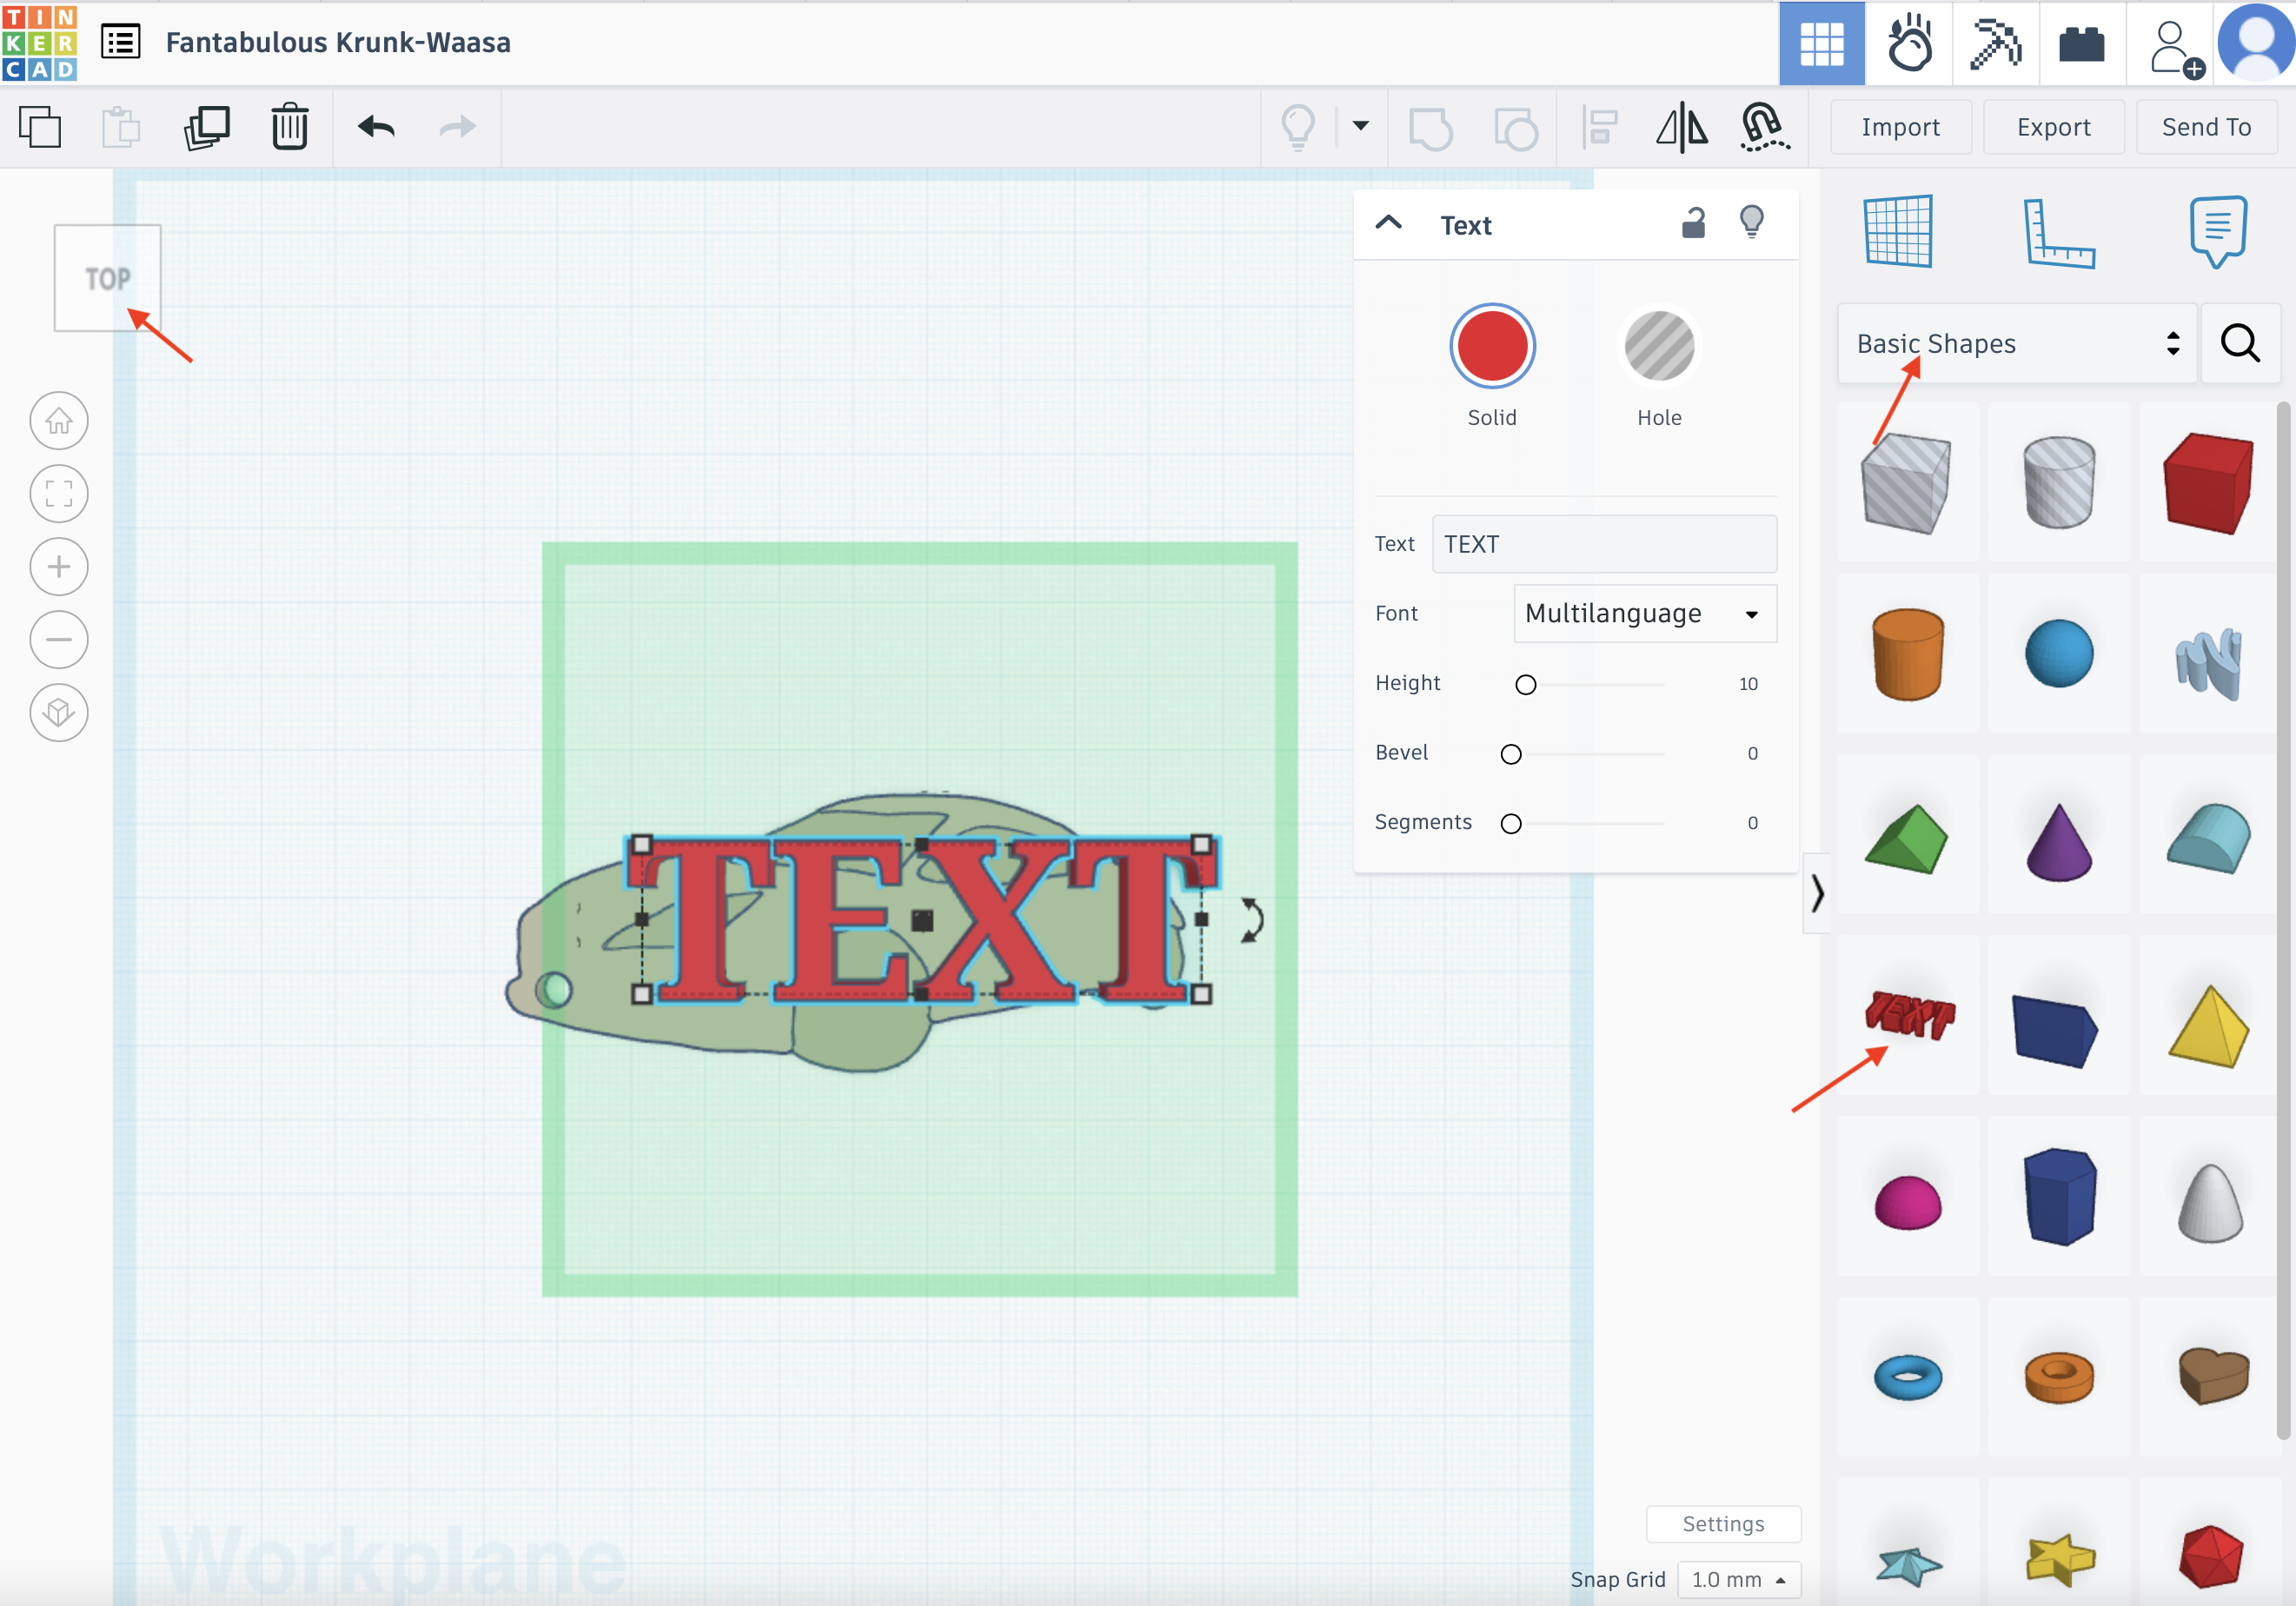
After you have imported your STL file, the model will appear on the workbench. You can adjust your angle of view through the cube on the left. Choose the Basic Shape in the right setting box and find the "TEXT" object. Drag it on your STL model. Click your "TEXT" object and there is a setting box for the object to appear on the right. You can change the text in the box.
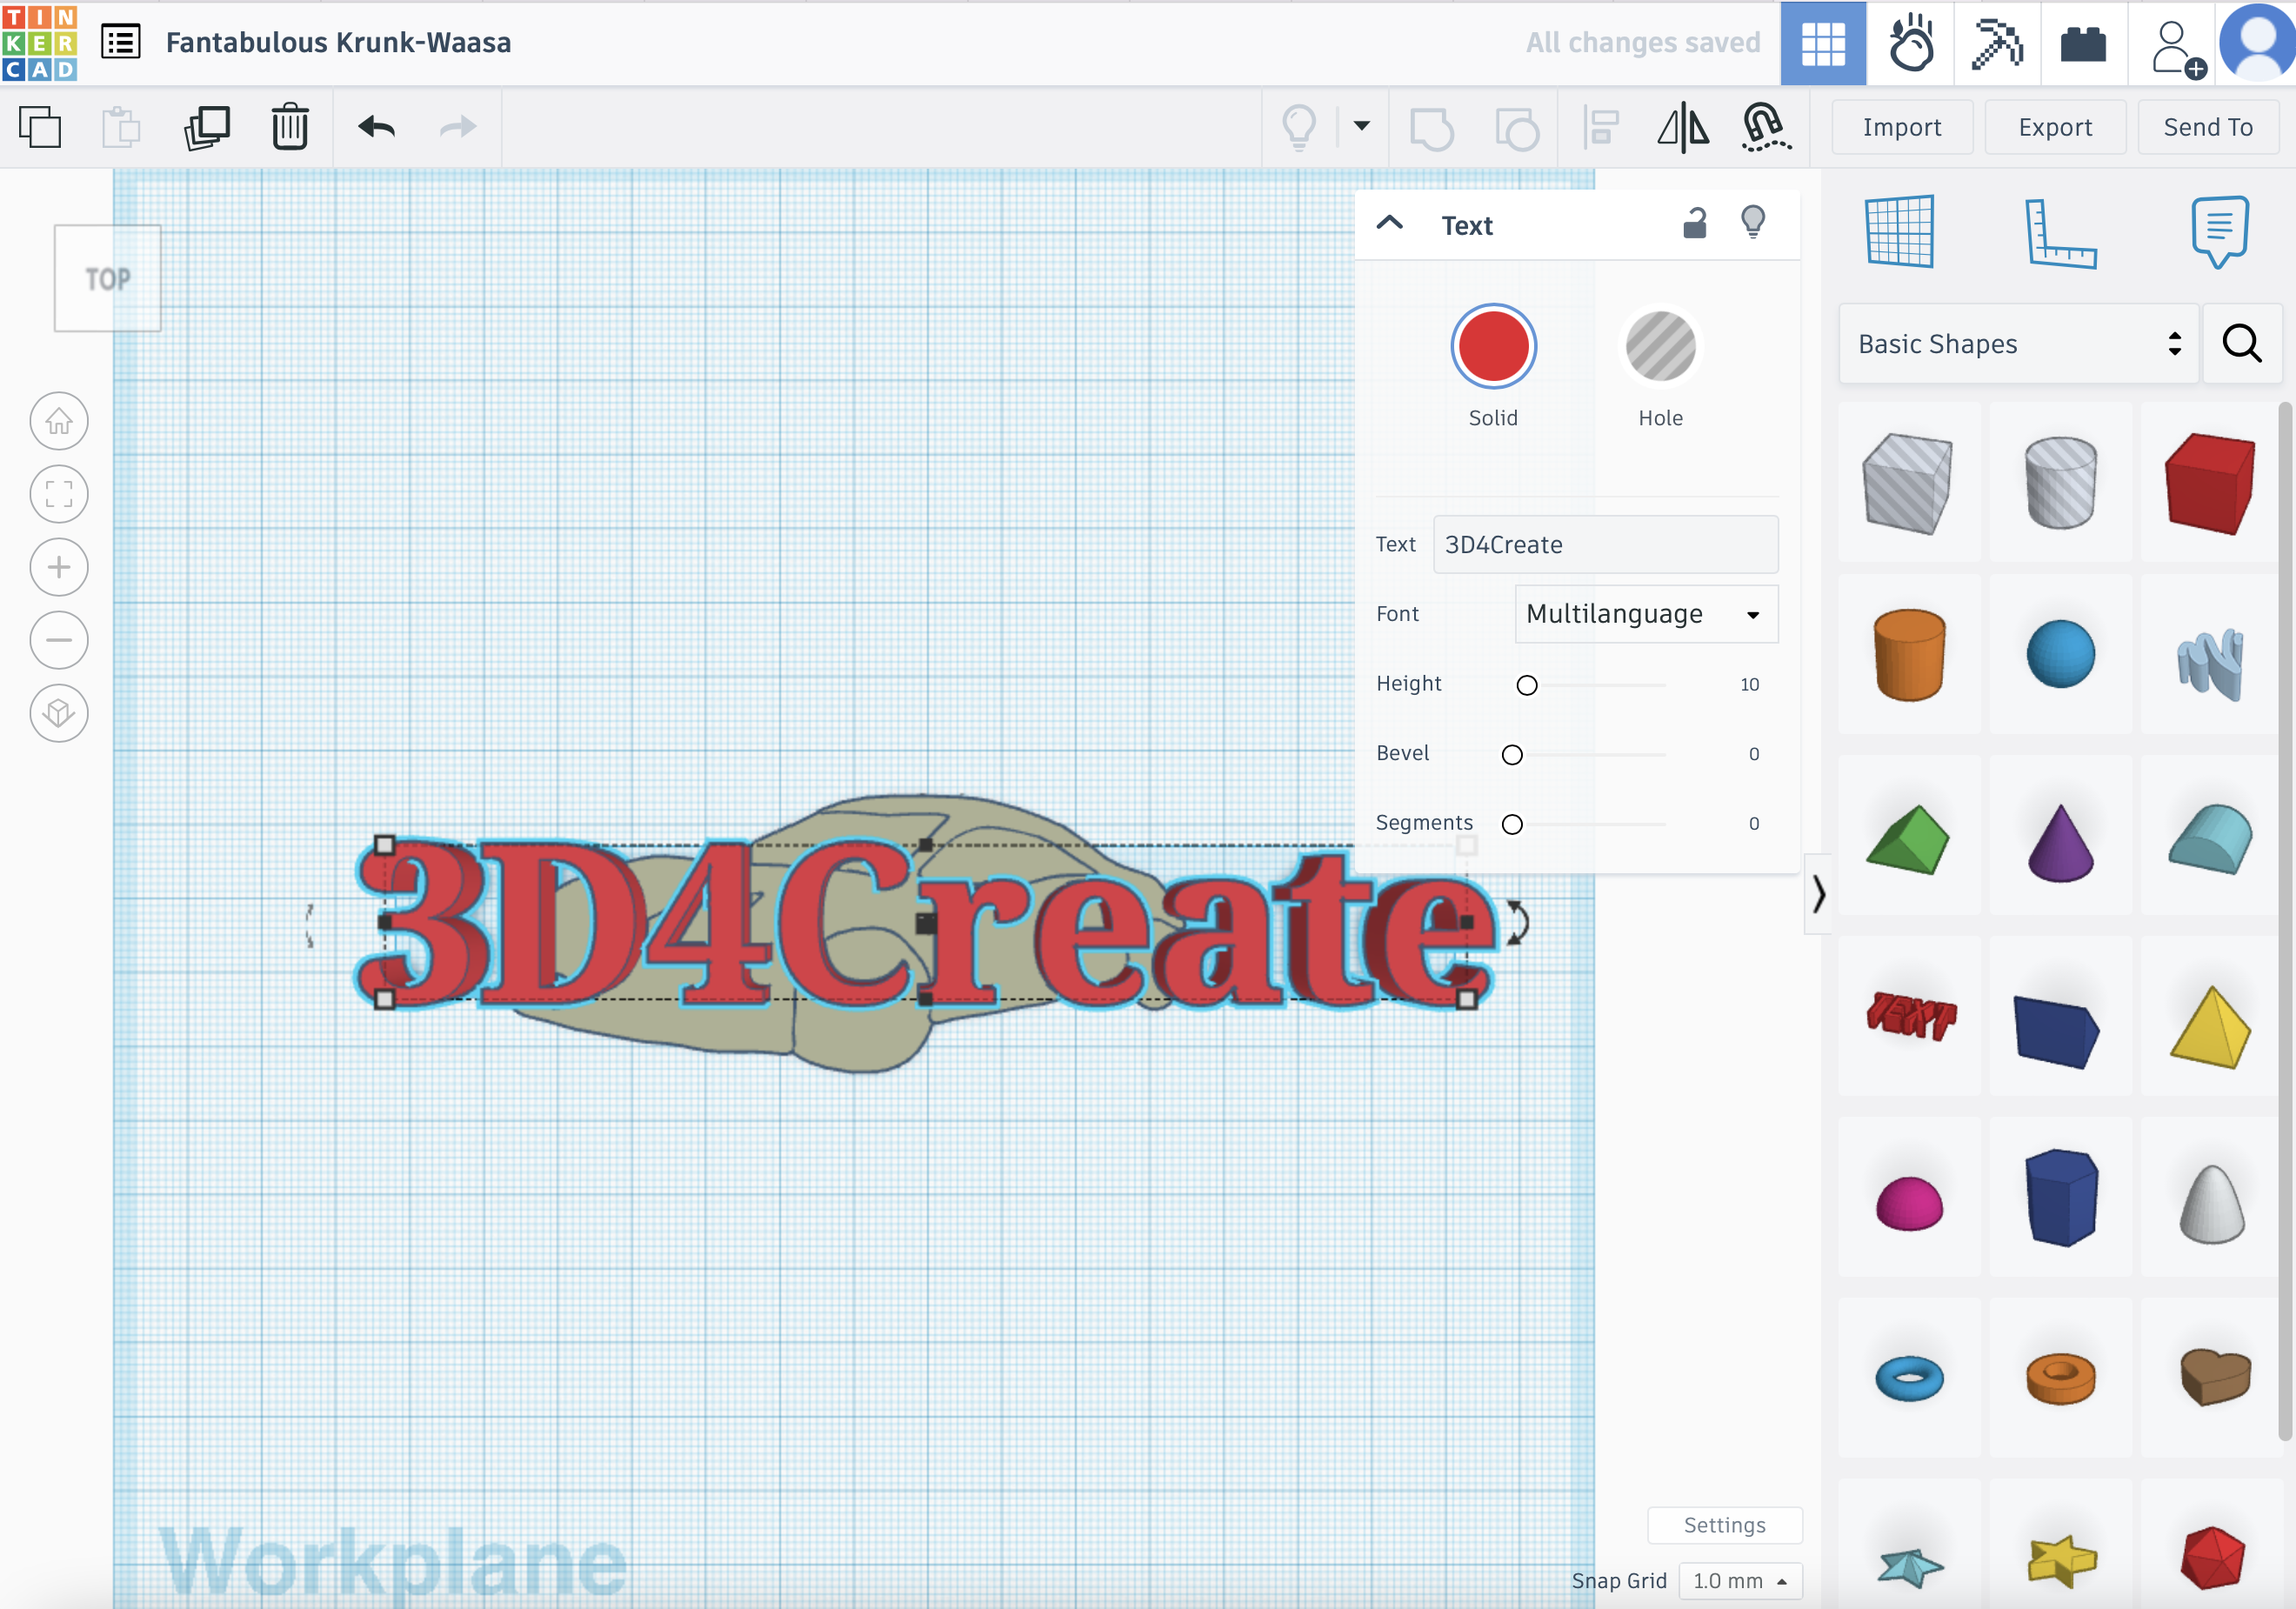
Step 5: Edit Your Text's Size
After the text object is dragged on your model, you may edit its size to make it fit your model. You can edit its size by dragging one of the corners, and you can also change the angle of view to adjust the height of the text object.

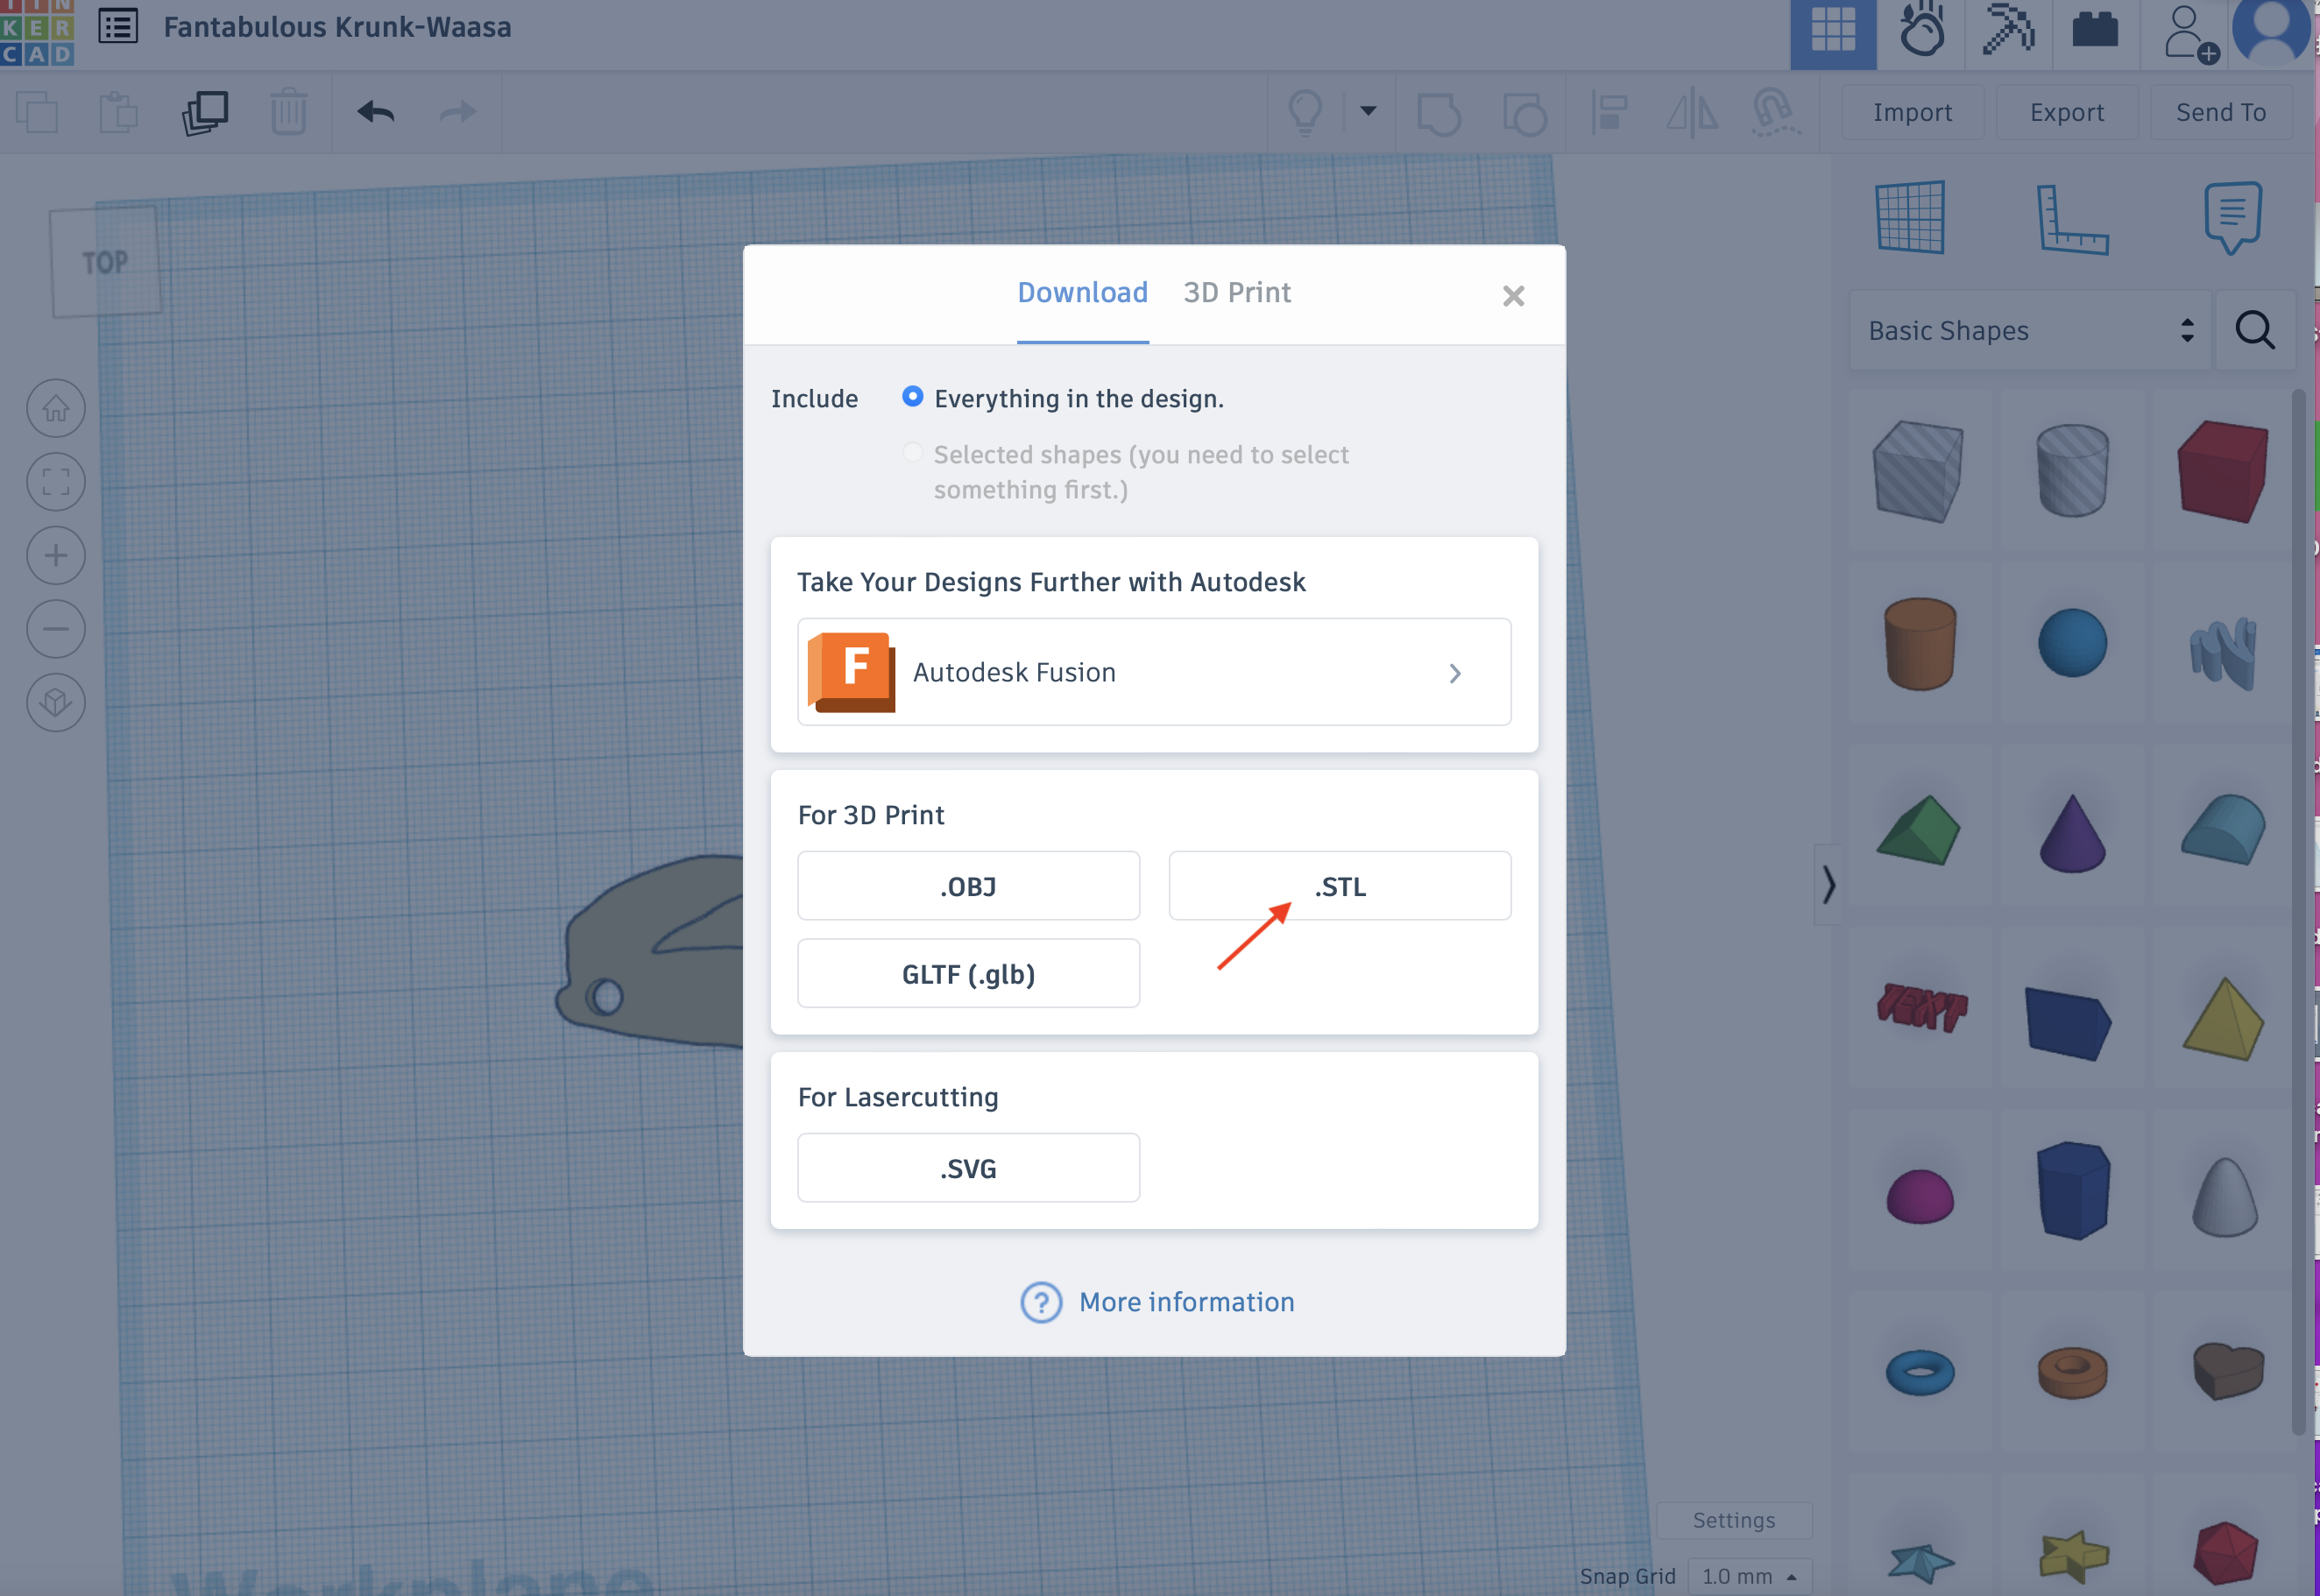
Step 6: Export Your Edited STL File
It's time to export your finished STL file. Click the Export near the Import. Make sure you choose to download your model in .STL format. Normally, your device will download the file automatically.
Step By Step Guide for Adding Text to STL Models on Bambu Studio
Compared with Tinkercad, Bambu Studio is more suitable for advanced creators. Rather than an online platform, you should download this application from its website.
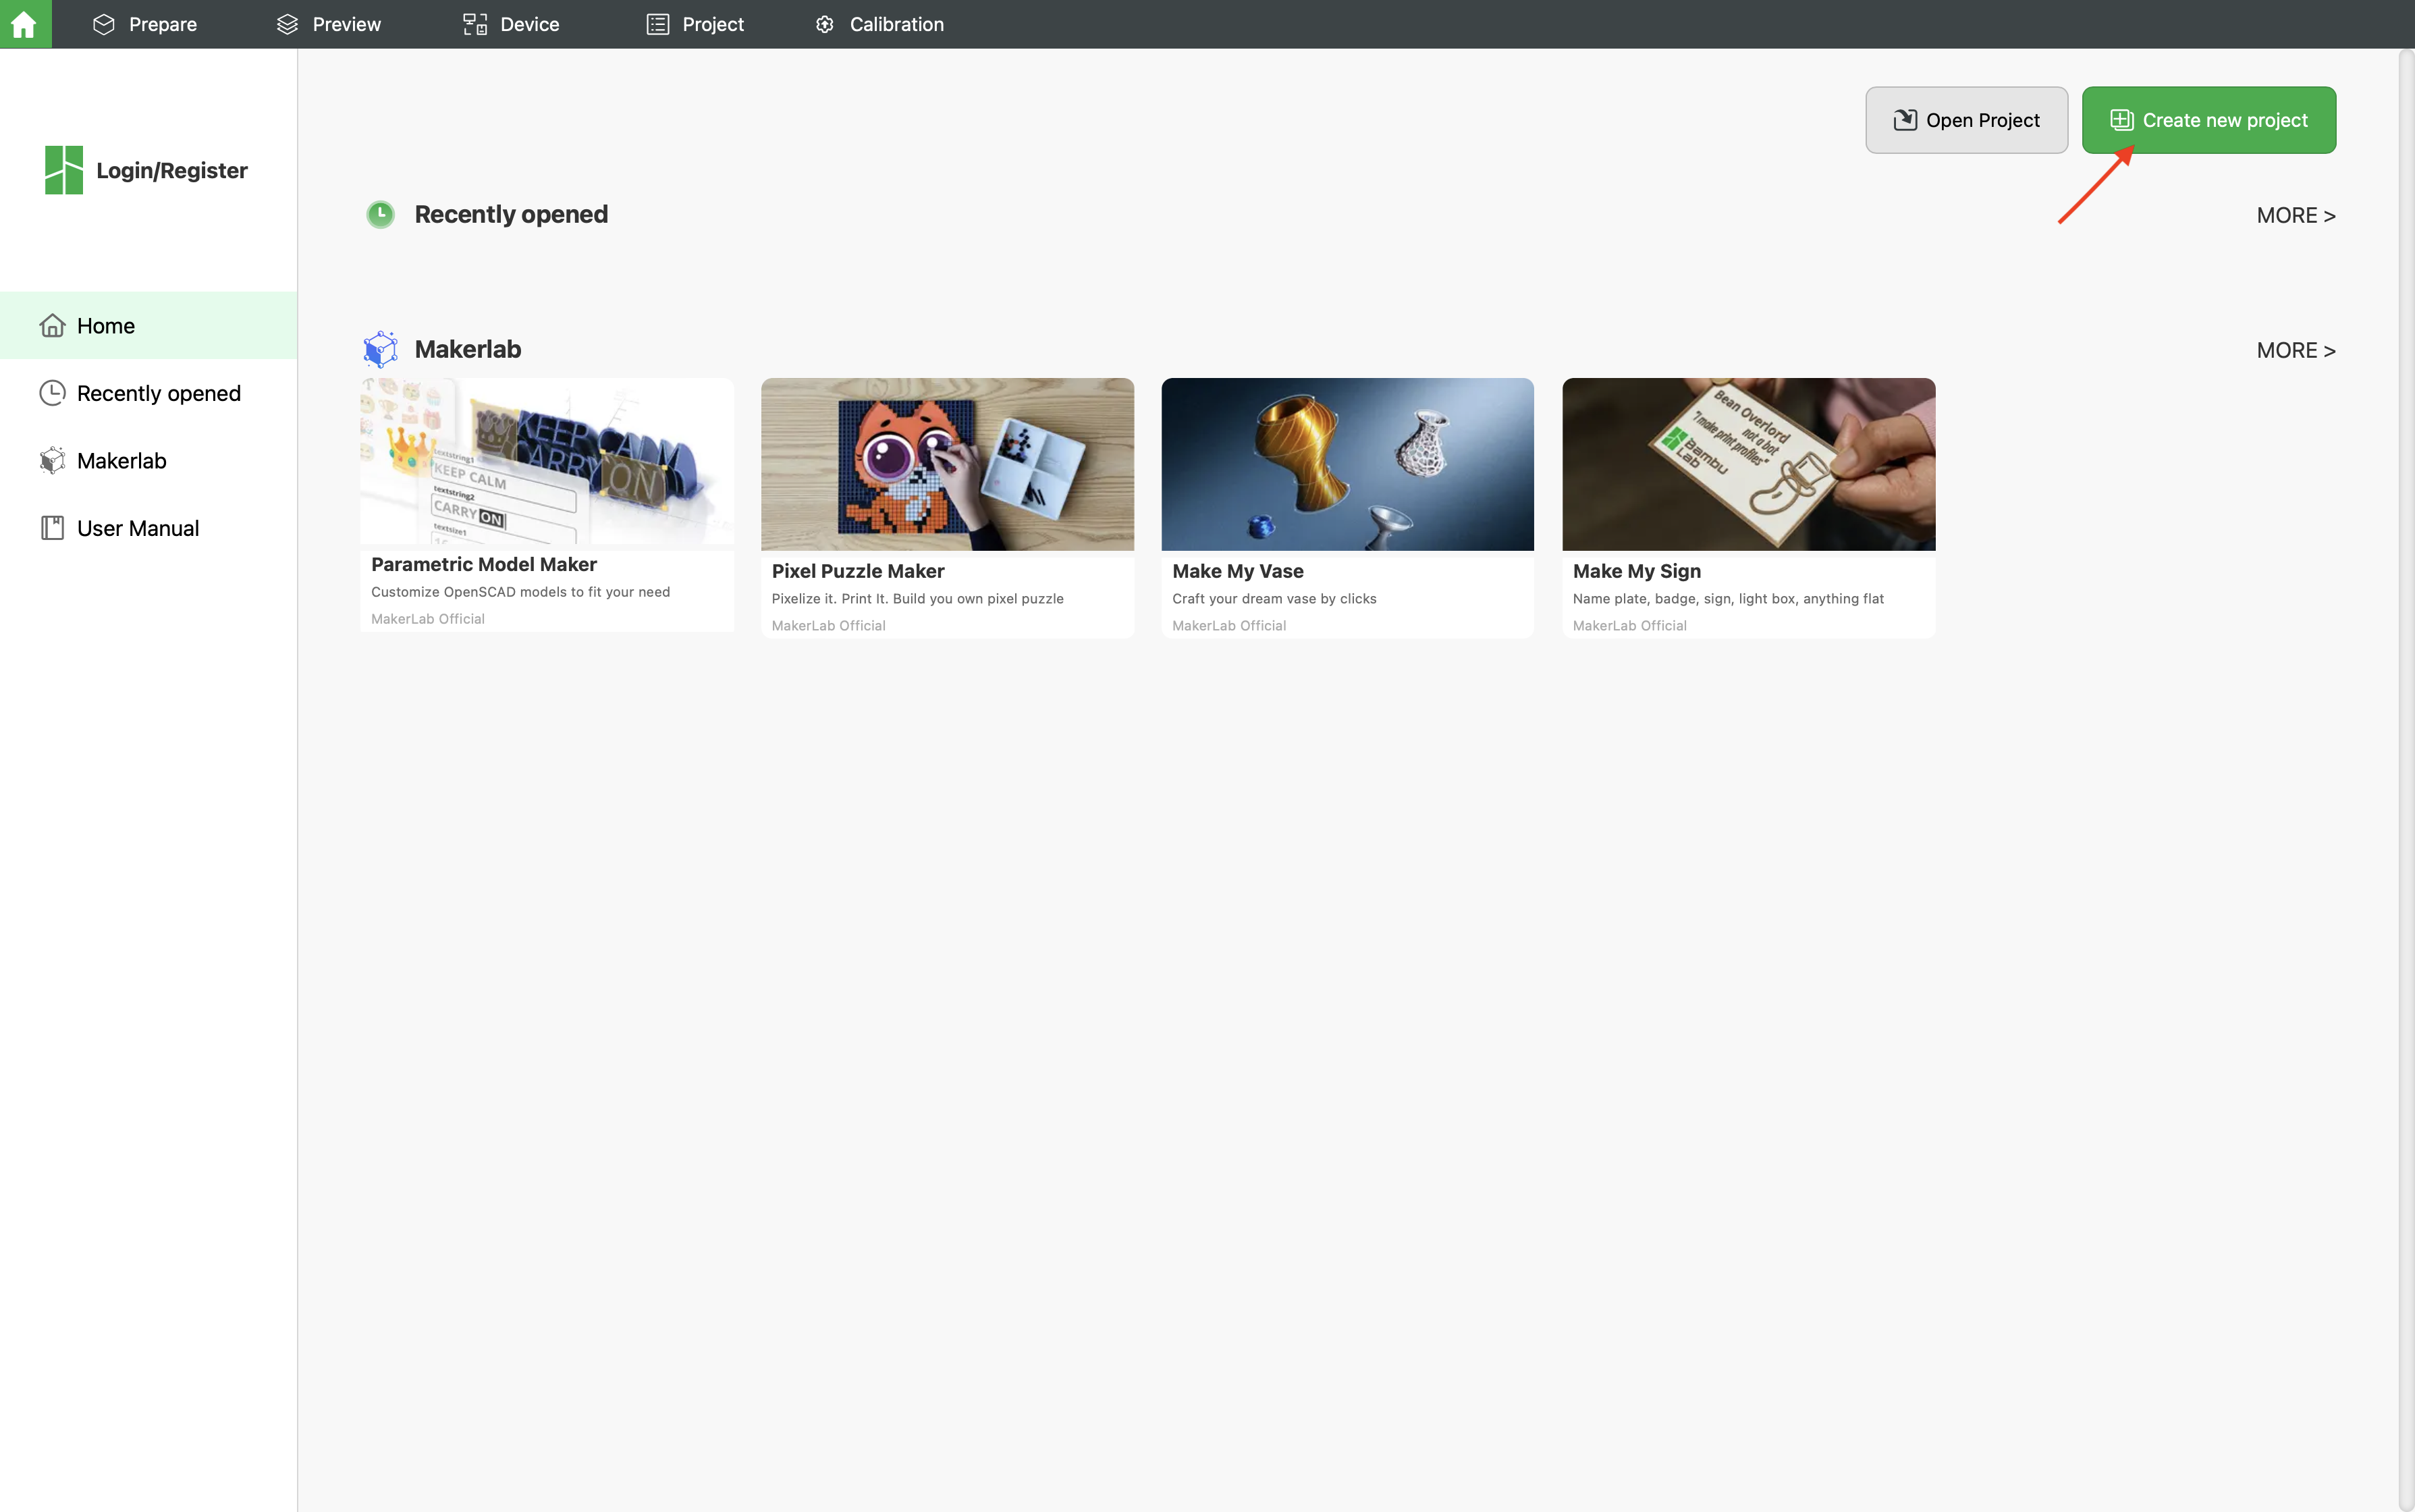
Step 1: Create a New Project
Open Bambu Studio and click "Create new project". (Login or not is optional)
Step 2: Import Your STL File on Bambu Studio
Click the "Add" icon at the left of the toolbar, then you can upload your STL file.

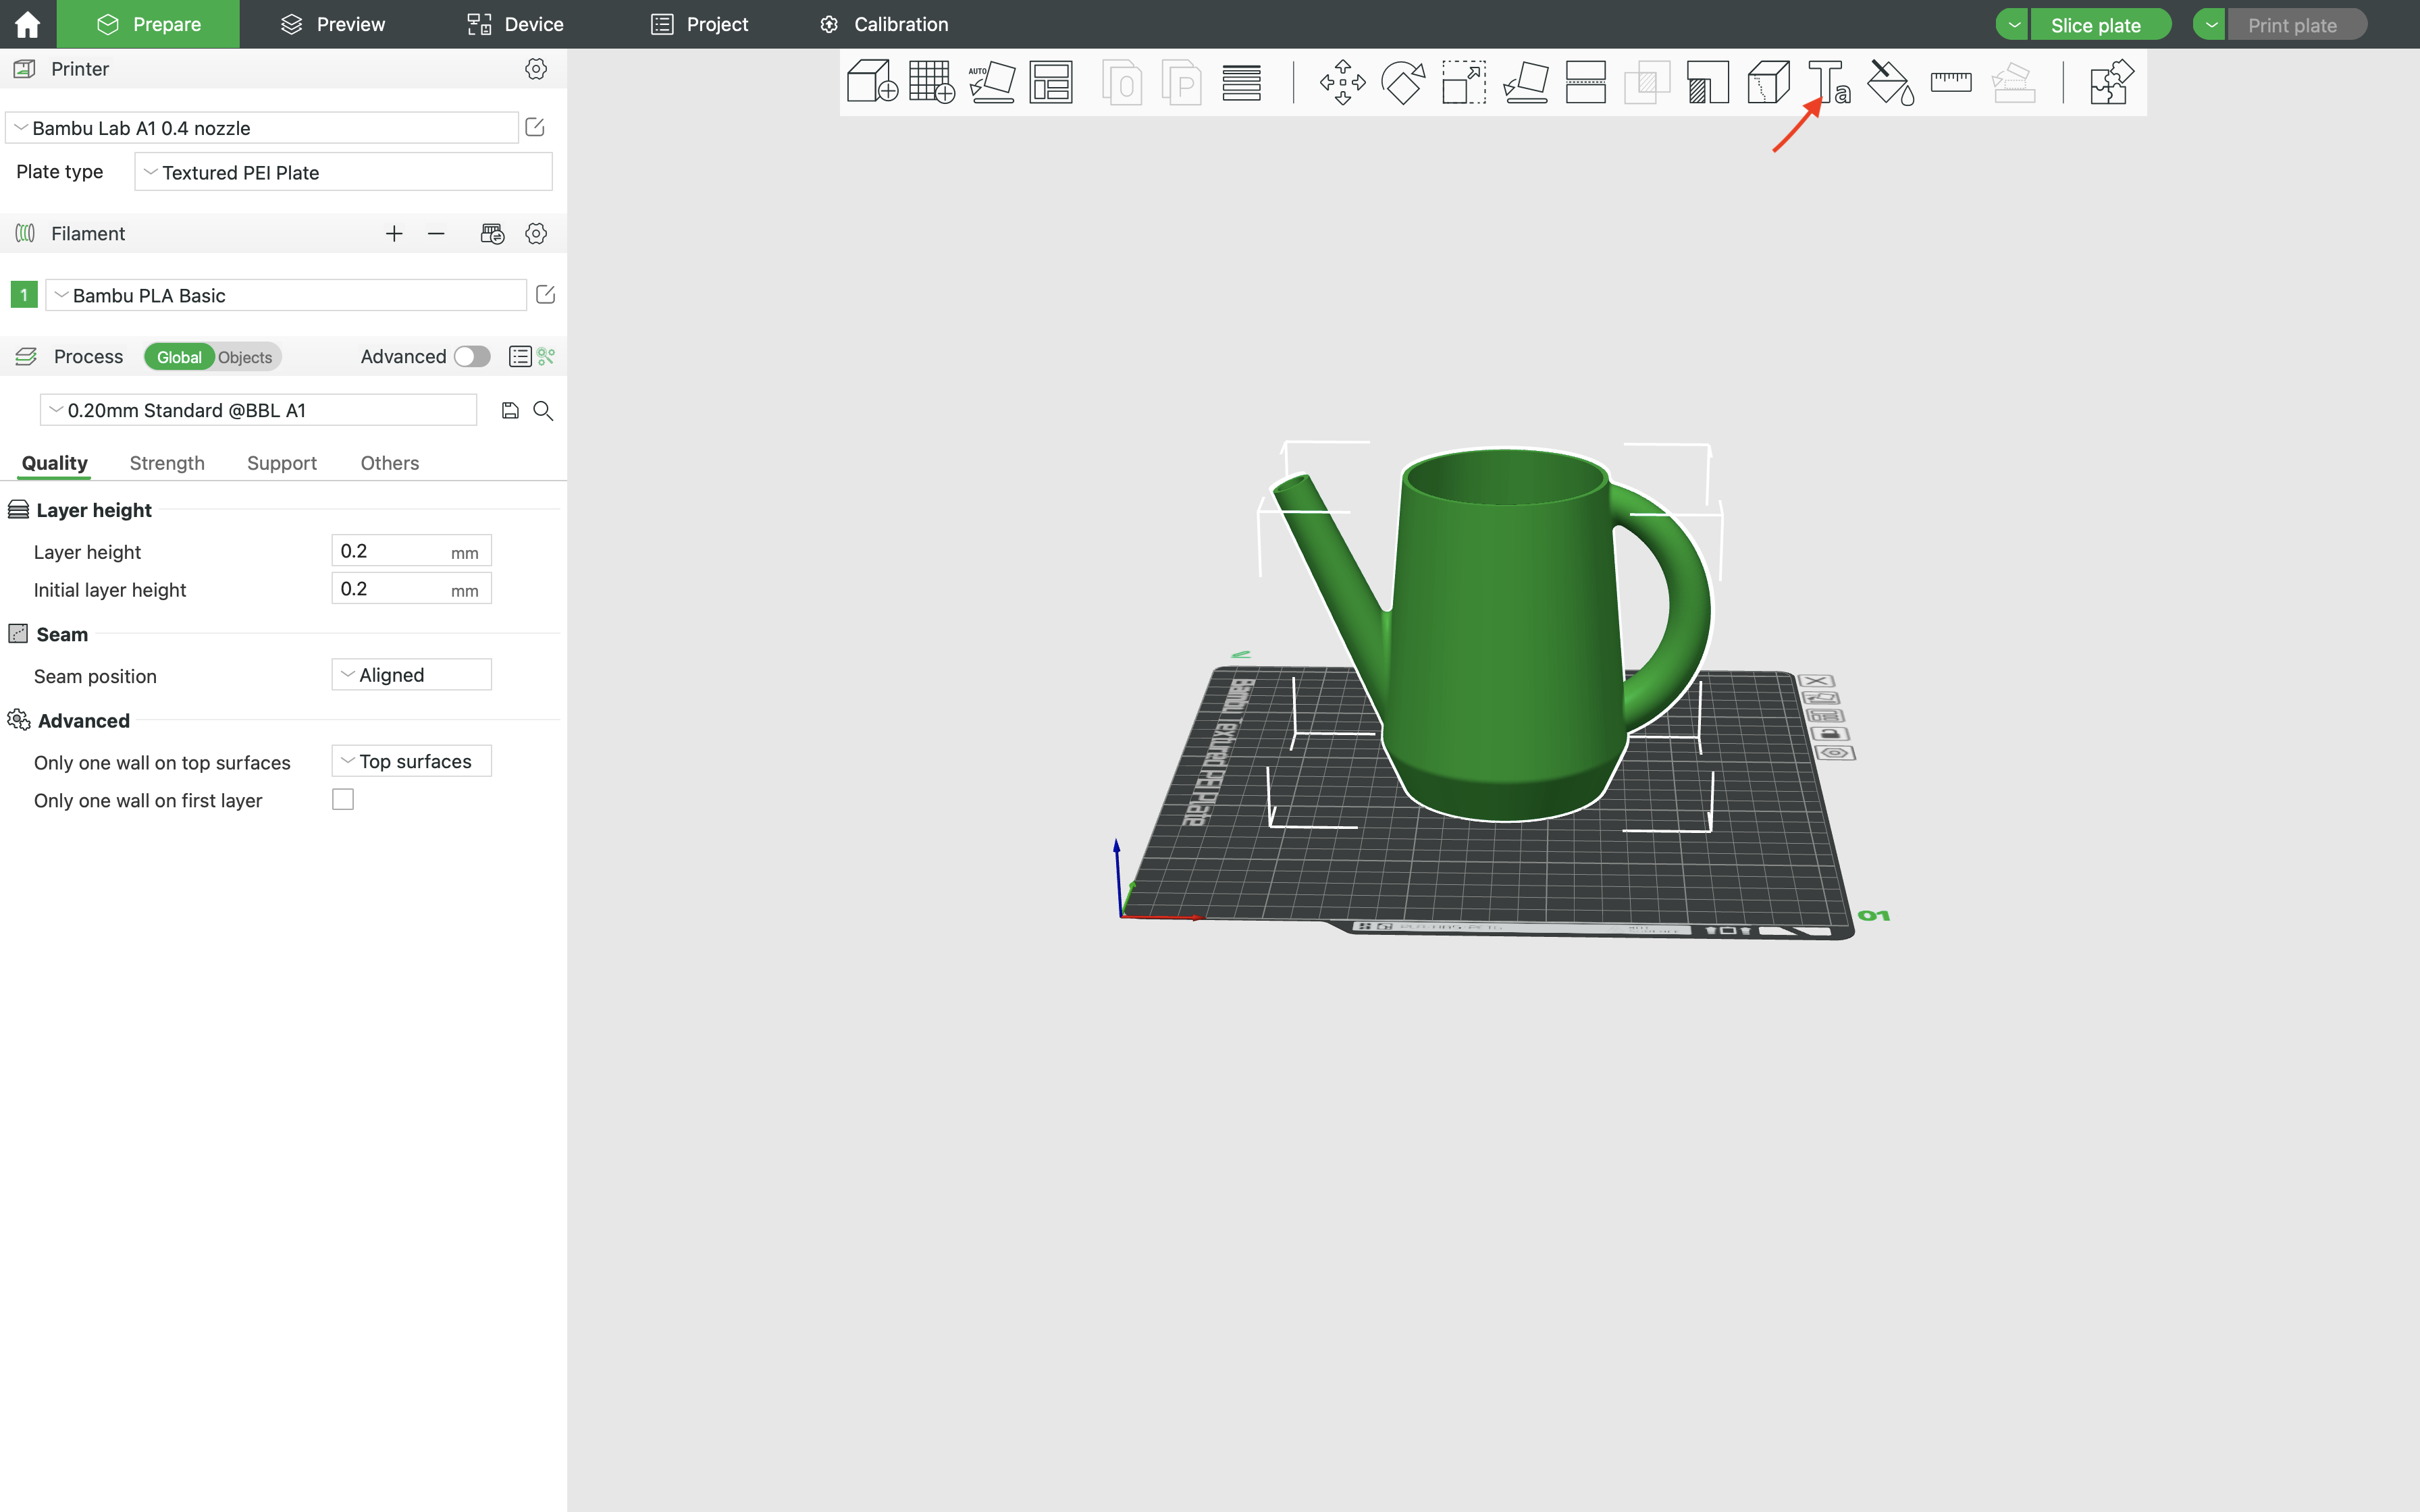
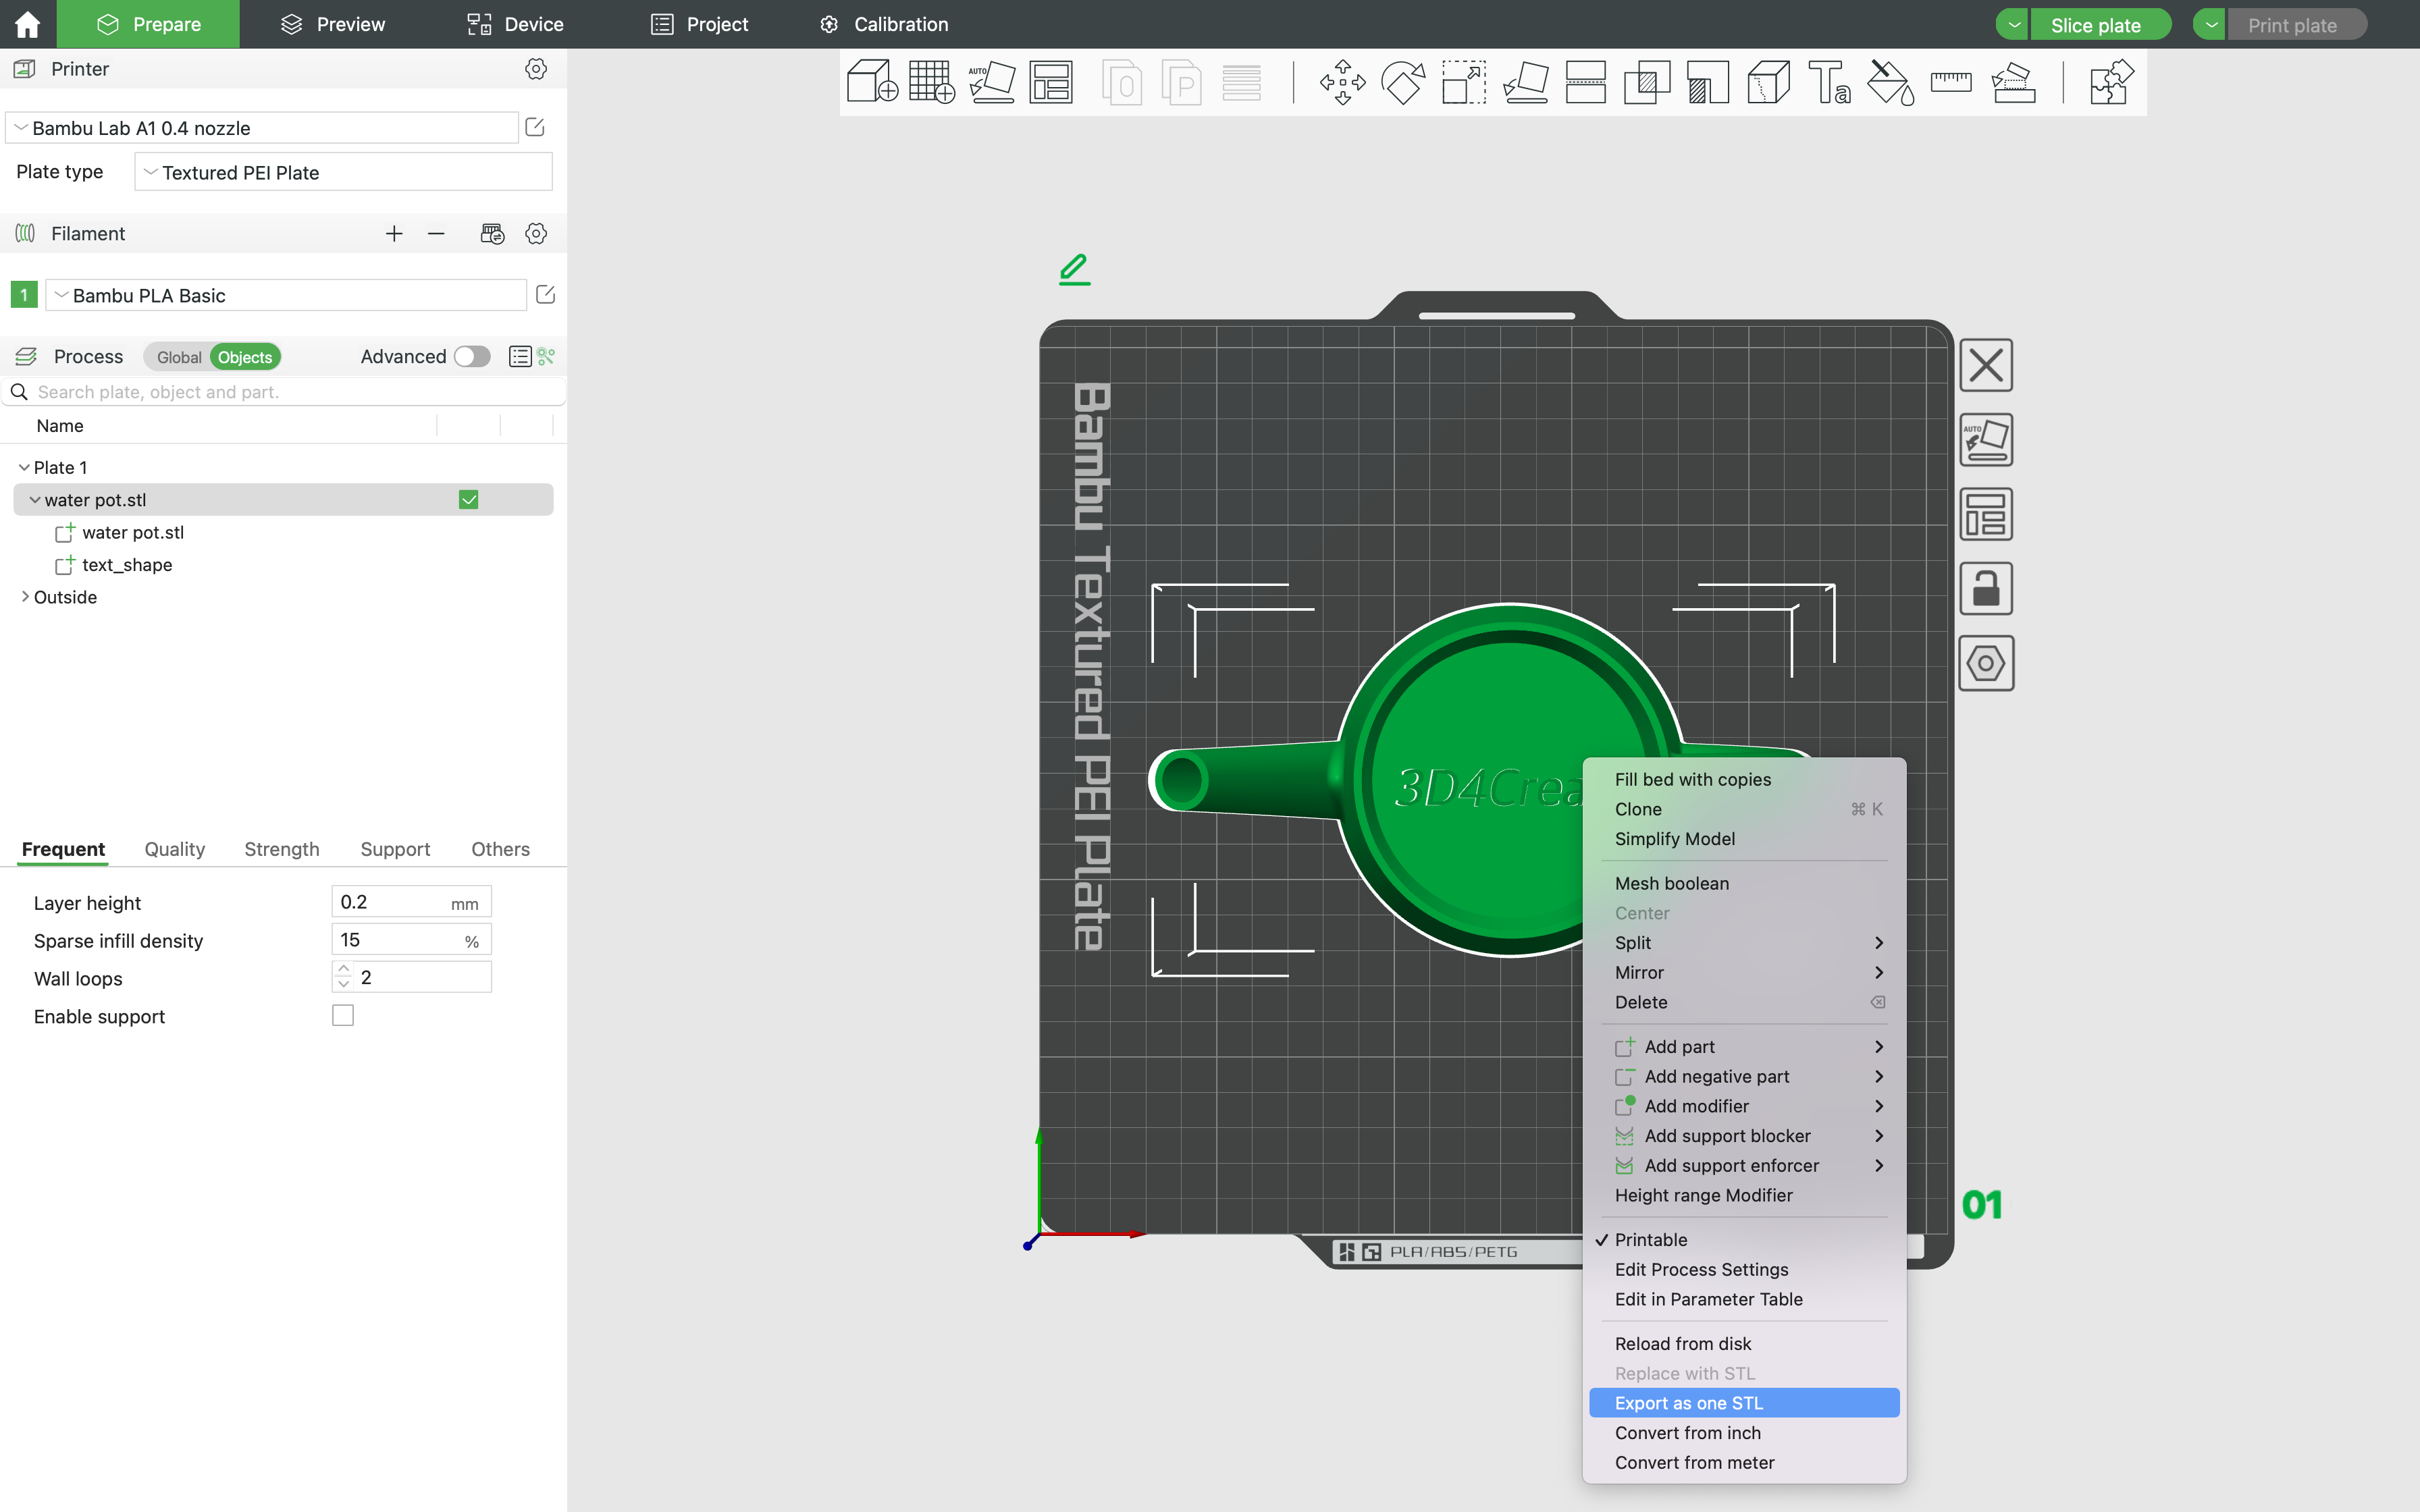
Step 3: Append Text to the Model
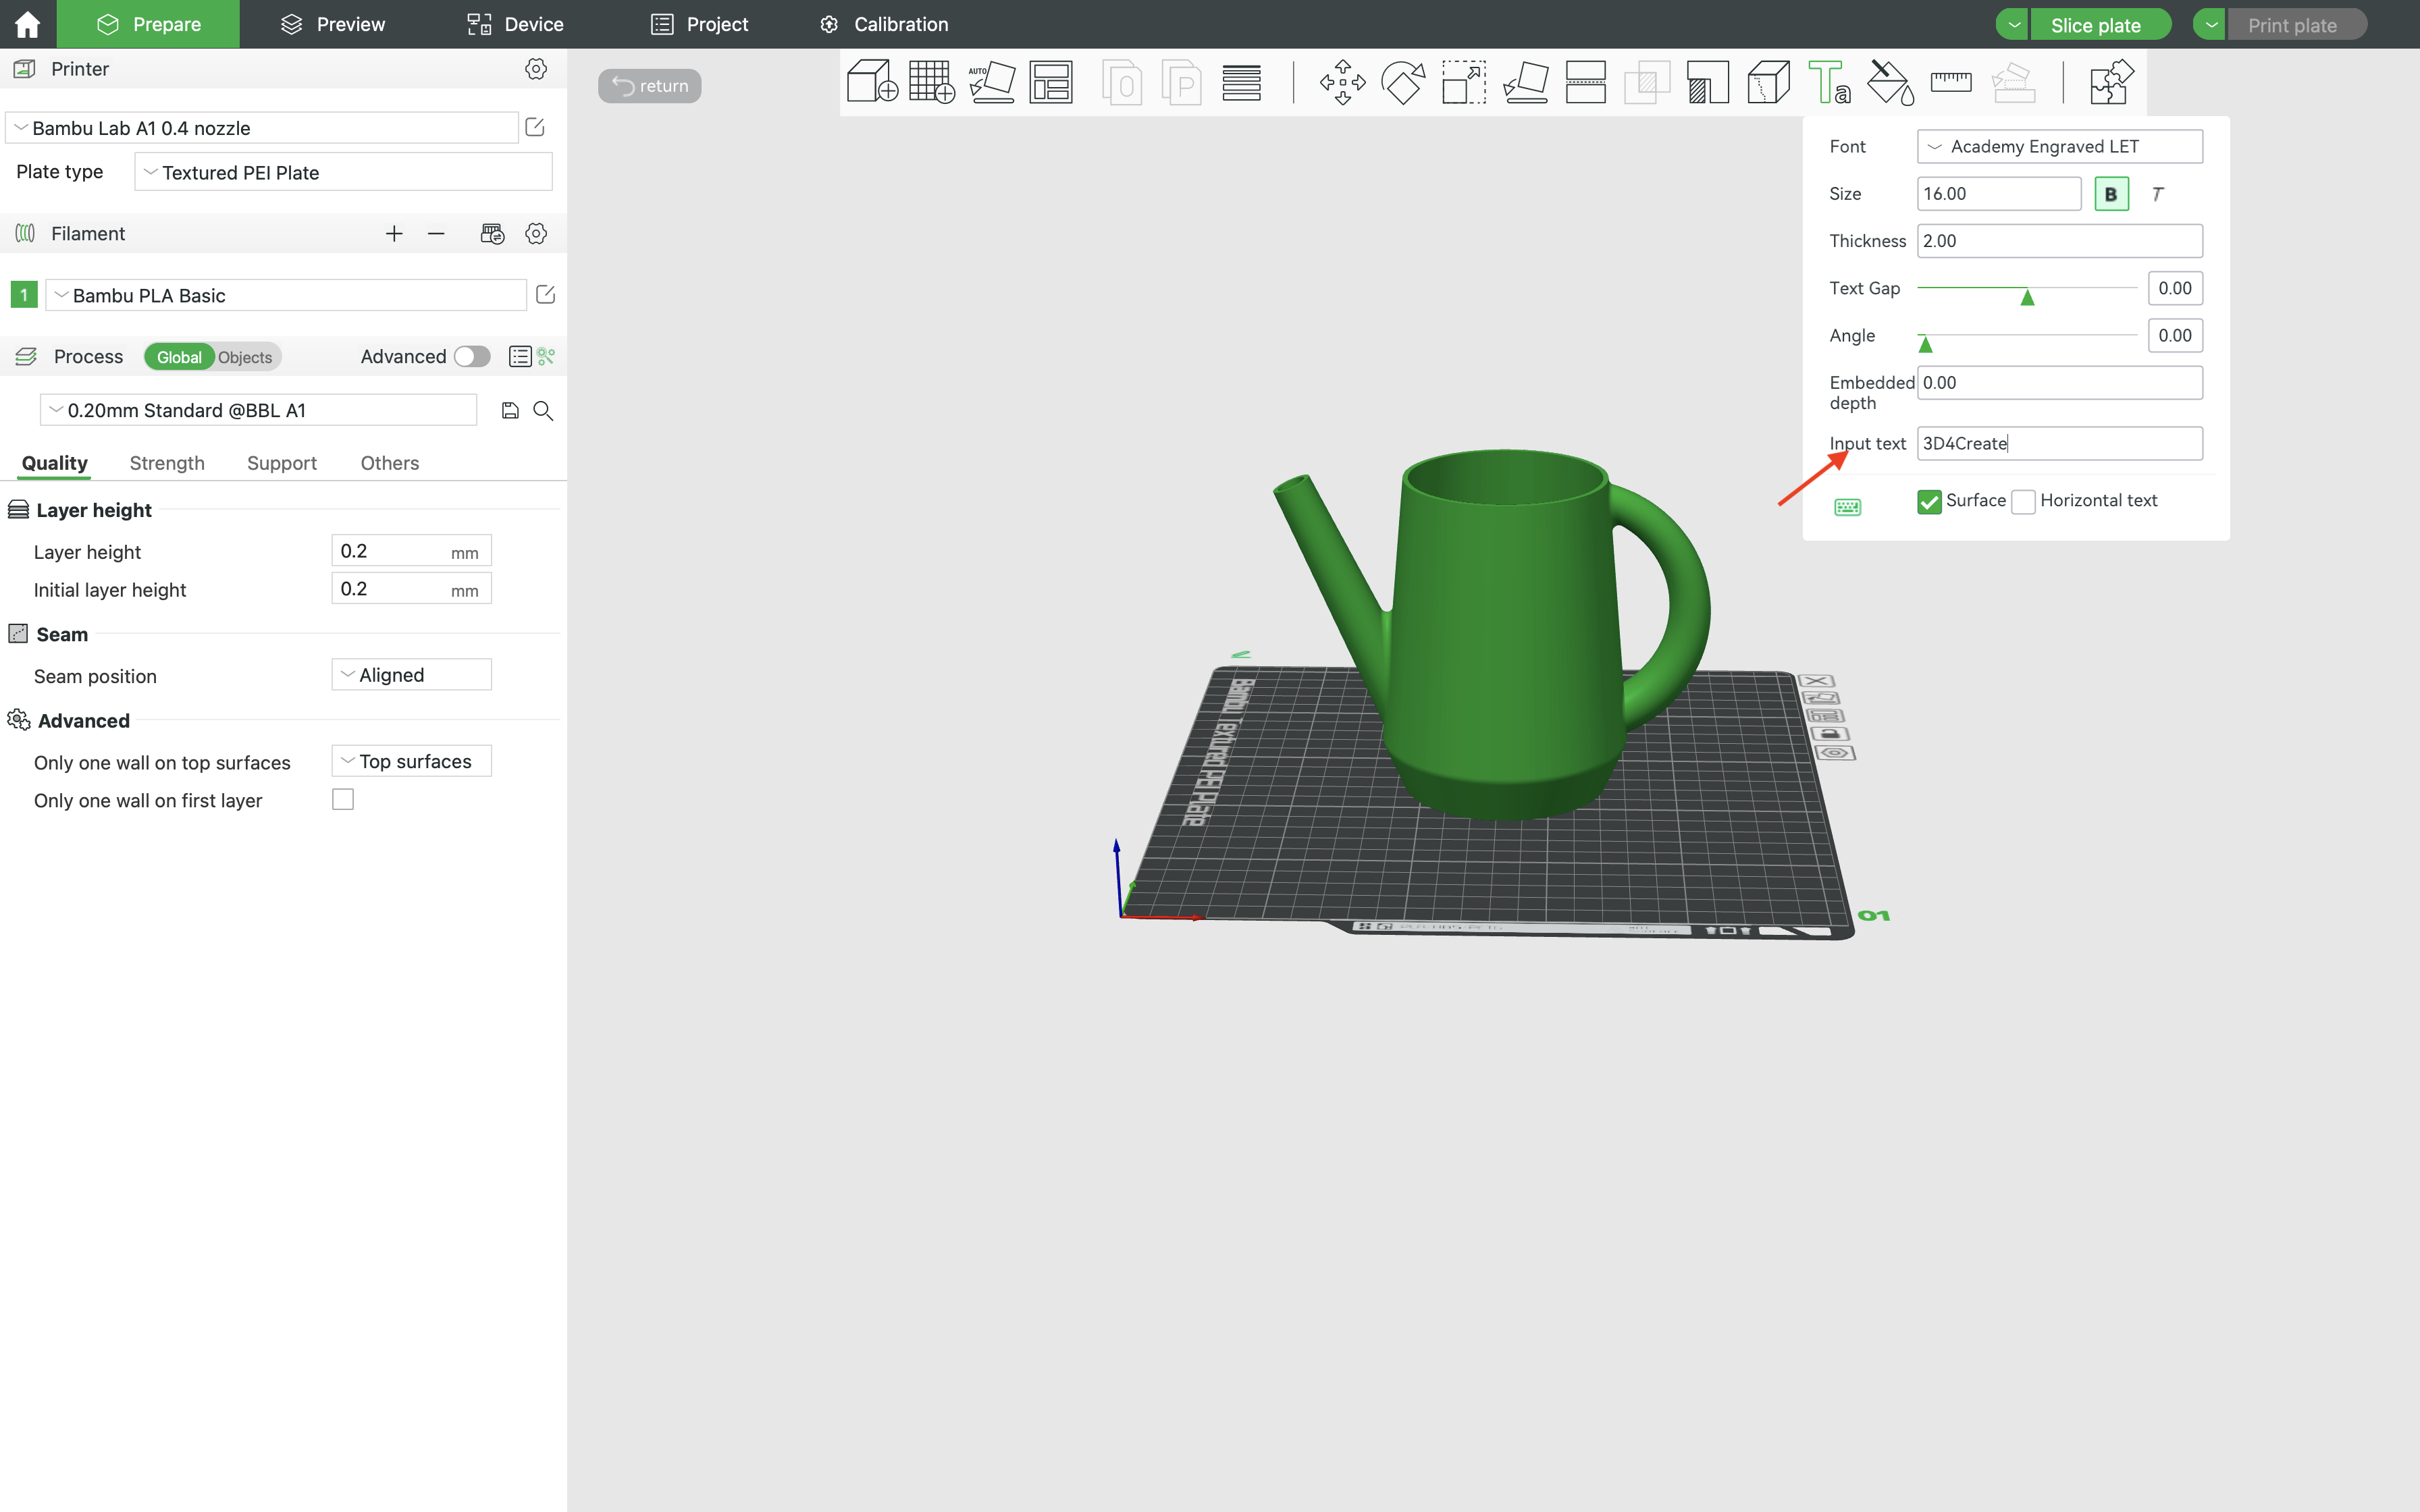
After importing your STL file, the model will be placed on the plate. Click the model and find the "Text Shape" in the toolbar. Click the "Text Shape" and the settings box of the text will appear. You can type your actual text in the Input text. Next, click your model and the text object will be automatically placed on your model. Unlike Tinkercad, Bambu Studio supports the text object attaching to a round surface.
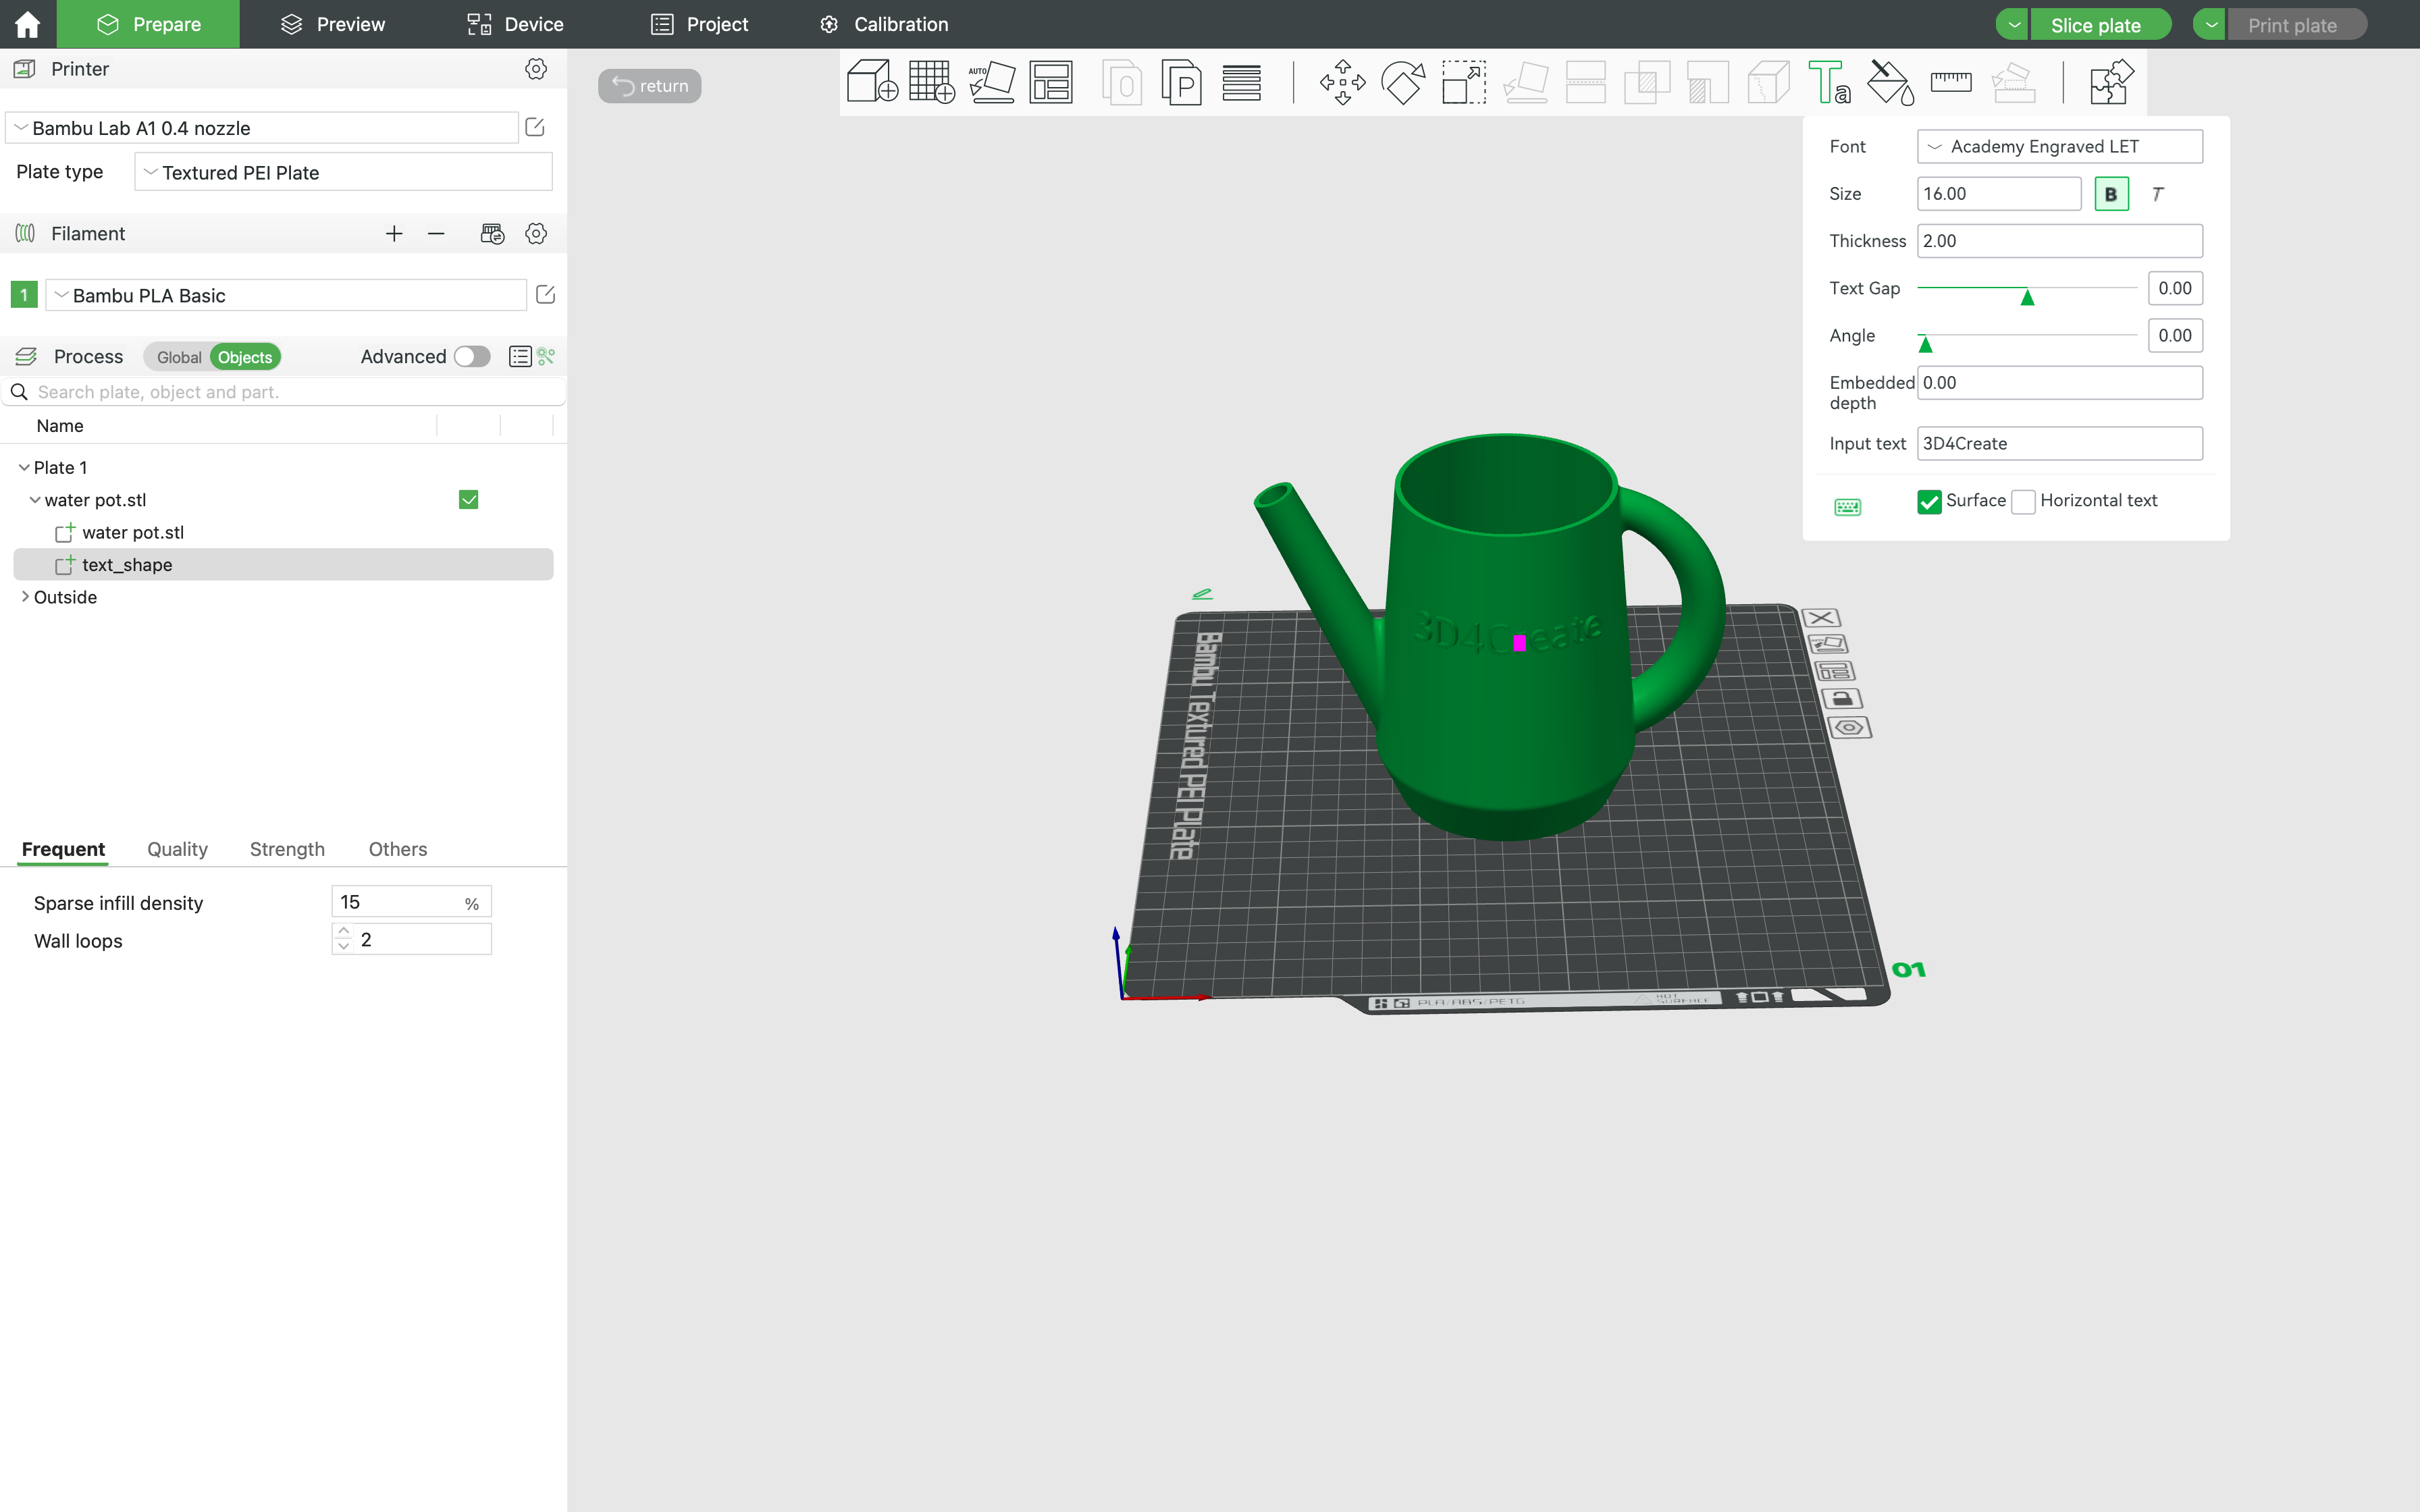
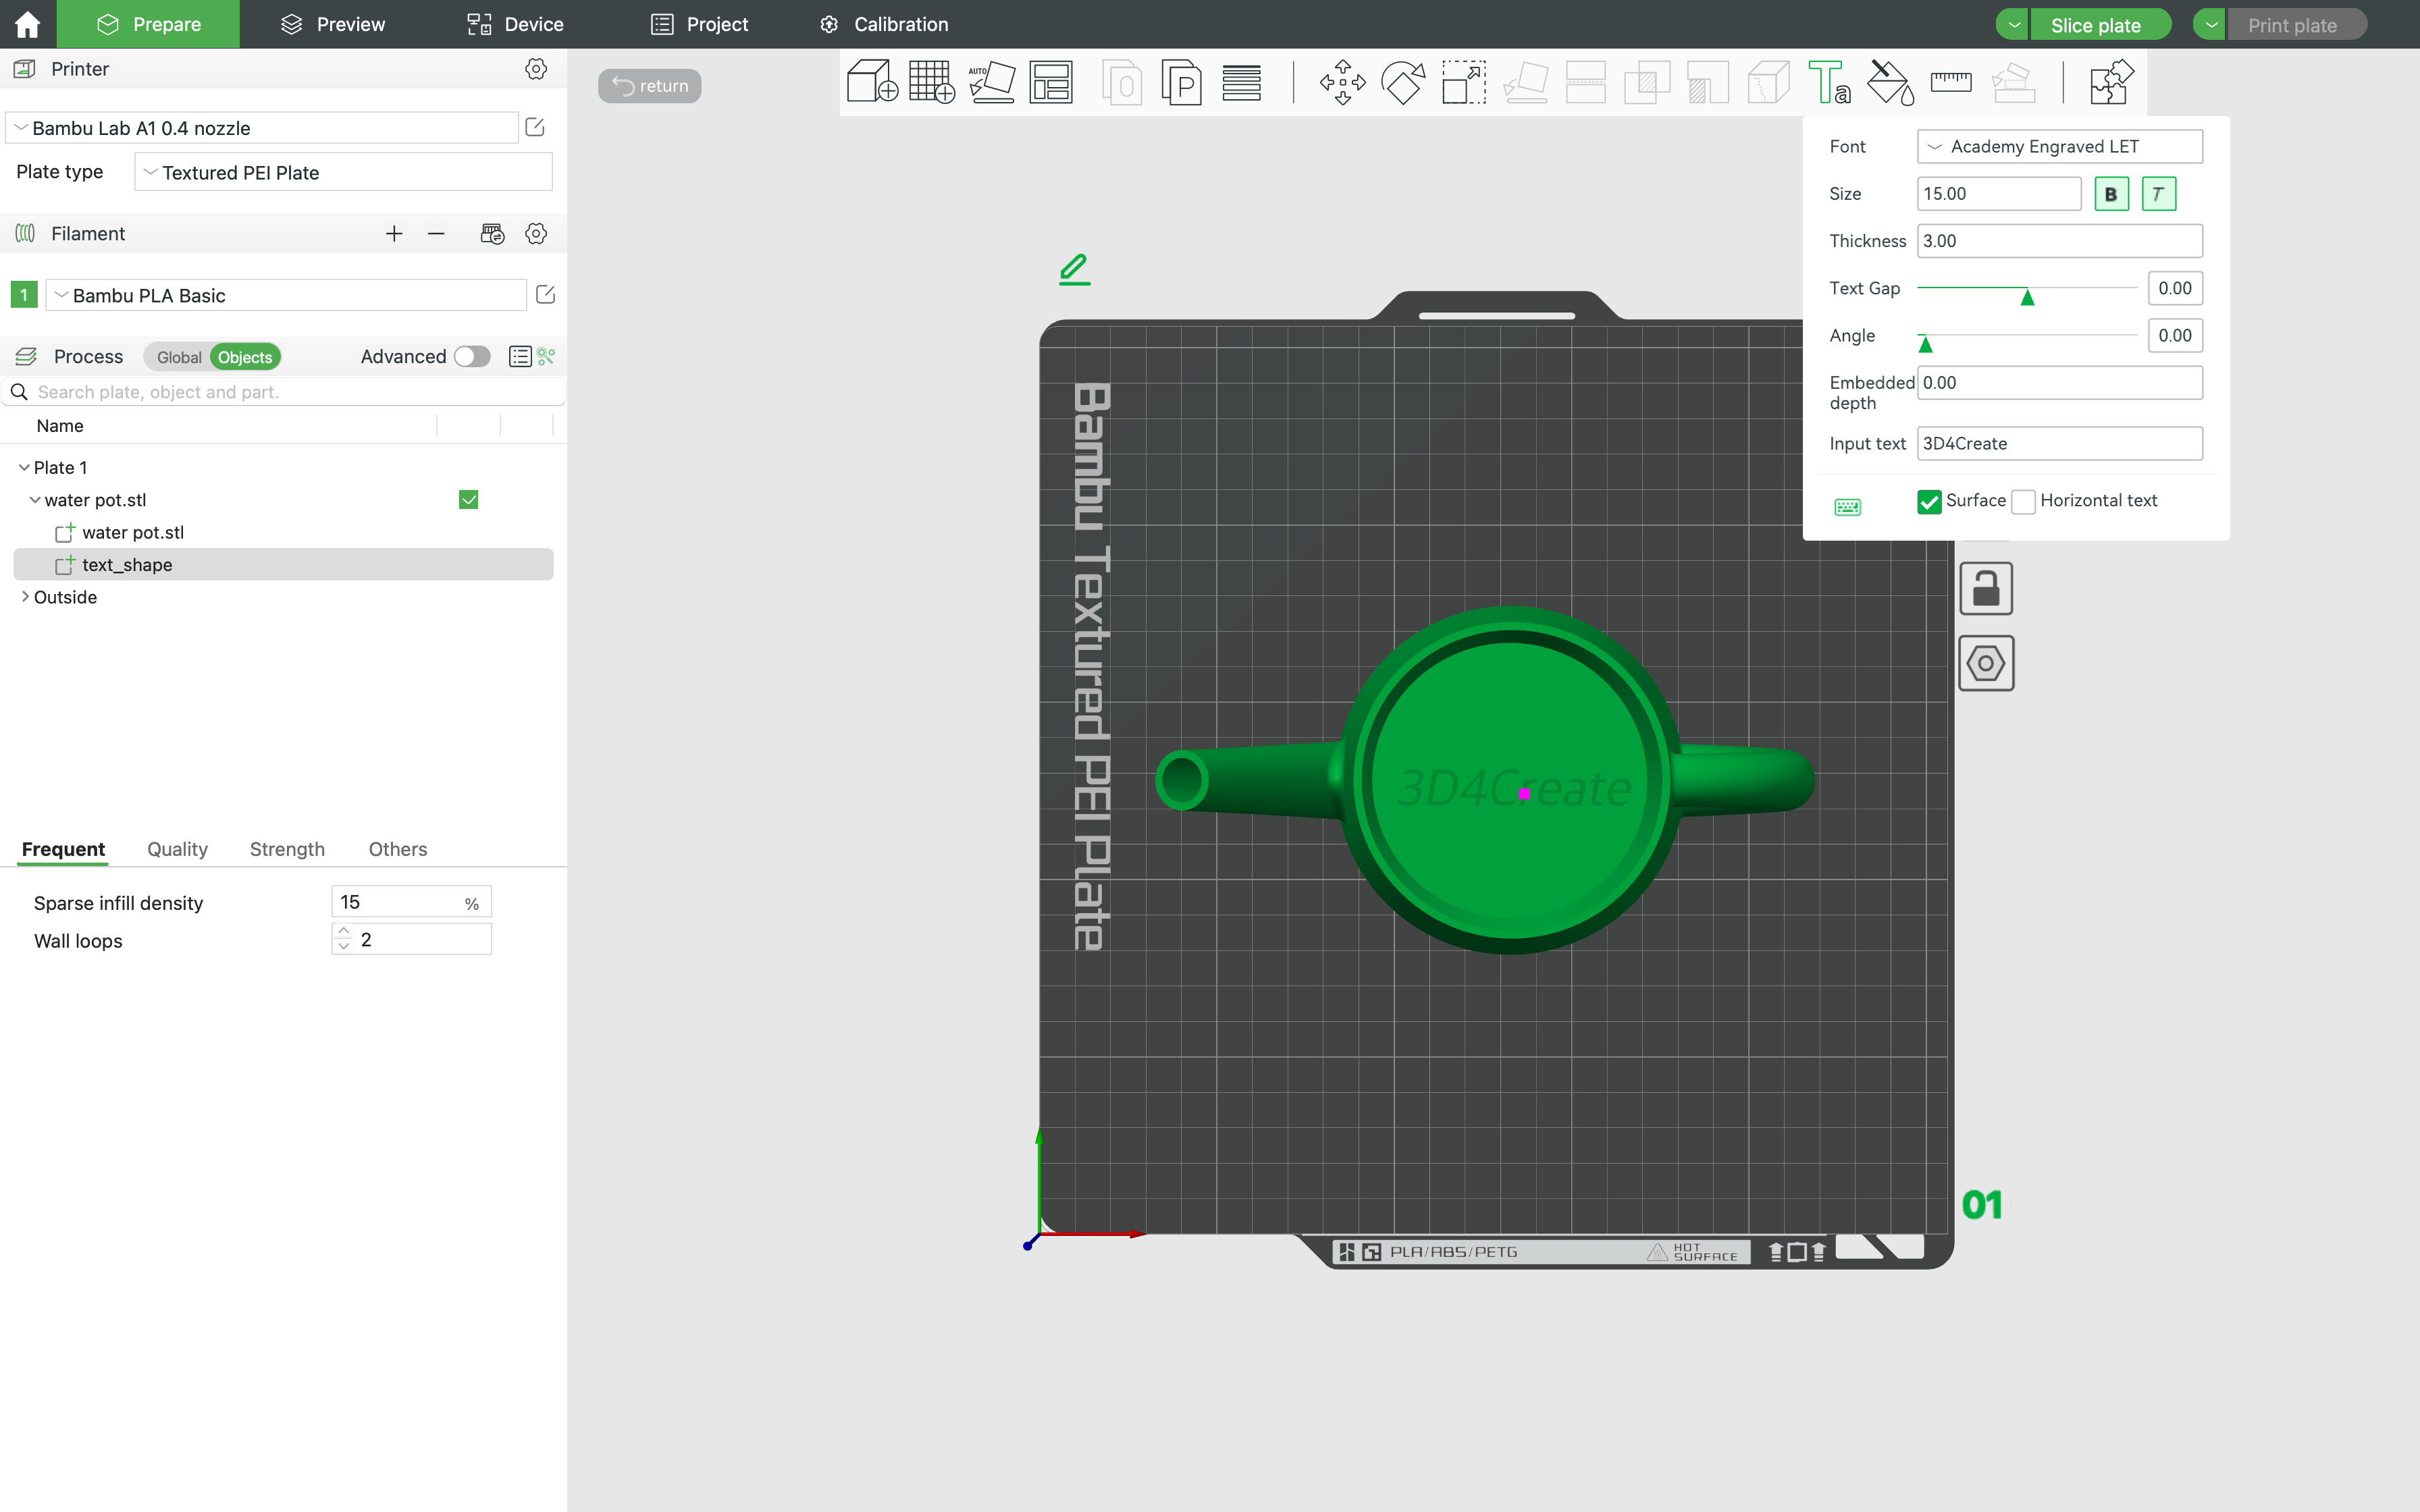
Step 4: Adjust the Position and the Size of the Text
Press and hold the pink point in the middle of the text and you can drag the text to anywhere you want. You can also adjust the font, size, thickness, gap, angle, and depth of the text in the settings box.
Step 5: Export Your Edited Model
Right-click your model and press the "Expert as one STL", your file will be saved on your device.
Expressing Your Style Now!
Inserting text to your STL files can significantly enhance your 3D printing projects by allowing for personalization, labeling, or branding. Through powerful tools like Tinkercad and Bambu Studio, the process is effective and approachable, even for beginners. Tinkercad's user-friendly interface makes it easy to manipulate basic shapes and add text, while Bambu Studio takes it further with more advanced editing capabilities.
Comente